


Making yogurt from powdered milk is easier than it sounds, and the result tastes nothing like the powdered milk you remember. This guide walks through a simple crockpot method using instant milk powder and a store-bought yogurt starter, including the right temperatures at each step, how to choose the right milk powder for a smooth texture, and tips for troubleshooting grainy or runny results. Also covers alternative incubation methods (Thermos, Instant Pot, cooler), how to use your own yogurt as a starter for future batches, and over a dozen ways to use the finished yogurt beyond just eating it plain.
Nobody grows up loving powdered milk. I certainly didn’t. Drinking reconstituted instant milk as a kid felt like drinking white water with a vaguely stale aftertaste, and I made my feelings about it very clear to my mother.
So it might surprise you to learn that I’ve been voluntarily making powdered milk yogurt on a regular basis for years now, and that it turns out smooth, creamy, and completely devoid of everything I hated about instant milk. Turns out the secret was just doing something different with it entirely, and I’ve been using it to make homemade yogurt ever since.
This article updated June, 2026.
Some of the links in this post may contain affiliate links for your convenience. As an Amazon Associate, I may earn a small commission from qualifying purchases without any increase in price to you.
Table of contents
Homemade Yogurt Ingredients
This recipe makes eight cups. You’ll need:
- 1/2 cup yogurt (your “starter”) – This must be yogurt with LIVE bacterial cultures. It might be plain grocery store yogurt or 1/2 cup of yogurt from your own last batch. If using your own yogurt, it must be less than two weeks old. Any older than that and the cultures die off and the old yogurt won’t properly inoculate your milk to turn it into new yogurt. As an alternative to actual yogurt, cheese supply companies sell powdered bacterial cultures specifically formulated for yogurt-making. These keep in your freezer for up to a year.
 Enough milk powder to make eight cups when reconstituted – A quick word here about what kind of instant milk to use: There are many different brands on the market. I’ve tried several different kinds and some work better than others. I’ve stocked up on a high-quality instant milk for food storage and recipes like this one.
To make sure your yogurt is smooth and creamy instead of grainy or chunky, use a brand that is smooth and fine in texture while it’s still in powdered form, similar to powdered sugar or white flour. Grainy milk powder makes grainy homemade yogurt. I use a brand that says to use 3 Tbsp of powder for every cup of water. When making yogurt, I round it up a bit and use 1 1/2 cups of powder for my yogurt recipe.- Eight cups of water
- A crockpot – If you have a yogurt maker, you can also use it. You may also be able to find online tutorials that use an electric heating pad, and Instant Pot with a yogurt setting, or a dehydrator. I understand that these methods also work well. I’ve always used a crockpot and have never gone wrong, so this tutorial will discuss that method.
- A whisk
- A food thermometer

How To Make Homemade Yogurt
- Put eight cups of water in the crockpot and then add the milk powder and whisk it vigorously until all lumps are gone. If you miss a teeny little lump or two, it’s not a big deal. Put the cover on the crockpot and leave it on low heat for three hours, after which your milk should be in the neighborhood of 180 degrees F.
- When the milk comes up to temperature and /or has spent the appropriate amount of time in your crockpot, turn off the heat and unplug it. (Unplugging it is very important if you live in a house with little children who live for toggling knobs and pushing buttons that should not be pushed.) Leave it to cool down for about 2 hrs and 45 minutes. The temperature should decrease to around 110 degrees. Do use a food thermometer at each step to make sure it’s at the correct temperature.
- Now, take one cup of warm milk from your crockpot and put it in a bowl with your yogurt starter. This tempers your inoculant. Whisk it together until it is smooth, pour it all back into the crockpot, and stir it together.
- Cover the crockpot with a beach towel to hold in the heat and let it sit for about 6-8 hours. You might think that a measly little towel isn’t enough to keep it warm – trust me, it is. If you peek under the crockpot lid after a couple of hours, a warm, slightly sour yogurty smell will greet you. That aroma tells you that the live bacteria are busy doing their little microscopic jobs to create homemade yogurt goodness.
- After the yogurt sits on the counter under the towel for the prescribed amount of time, move the crock into the fridge overnight. You might be tempted to stir it a bit at this point, but this isn’t recommended. In fact, this is a good way to get grainy yogurt. For best results, don’t disturb the gel until it’s completely cooled.
Helpful Tips
- If the yogurt isn’t as firm as you’d like, add additional instant milk. The increased volume of milk solids will thicken it.
- Use a thin result as drinkable yogurt.
- Full-fat milk powder yields a richer, Greek-style yogurt.
- Not all instant milk is the same, so when in doubt, follow the reconstituting directions on the package.
- Different brands of instant milk and yogurt (your starter) yield different consistencies and flavors. Experiment to find the combination you prefer.
- Although inconvenient for large quantities, some people use a Thermos to maintain temperature for small batches.
Other Reasons to Learn This Technique
Making homemade yogurt from instant milk is a great technique to learn if your access to milk relies on its availability in stores, and it’s a great way to use Instant Milk in your food storage pantry. In addition, if you also store shelf-stable yogurt starter cultures, you don’t need store-bought yogurt either. Many varieties of starter cultures, such as Greek, Vegan, Icelandic Skyr, and Bulgarian, are available. Which you choose depends on your taste preferences. While they are more expensive, the trade-off may make sense for some people.
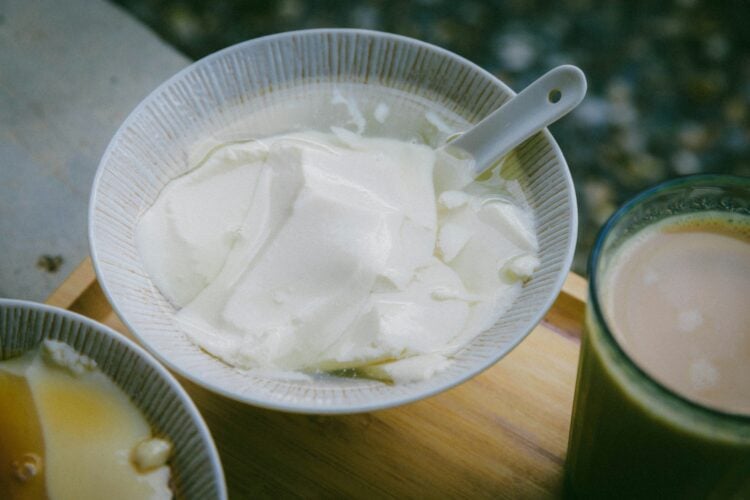
Great! Now, what do I do with half a gallon of it?
My children love this stuff and have been known to go through a whole batch in less than four days. One of my sons prefers it with homemade jam, and the other likes it with a bit of vanilla extract and some sugar for sweetening. I also use it to make naan, a variety of Indian flatbread. You could also:
- Drain it in cheesecloth to make Greek yogurt or even yogurt cheese
- Mix it with granola
- Make smoothies
- Substitute for sour cream
- Marinate poultry
- Make a veggie dip
- Frost a cake with yogurt buttercream
- Whip up creamy dressings
- Dehydrate it into yogurt drops
- Create parfaits
- Substitute for some of the oil in recipes
- Use as hair conditioner
- Relieve sunburn pain and itchiness
To be clear, none of these instructions are hard and fast rules. Sometimes I leave the milk warming in the crockpot for four hours instead of three. On more than one occasion I’ve left the crockpot on the counter overnight! It still turned out fine.
For long term storage options, read this post about two shelf stable yogurt options.
This post was originally published in 2015 and has been updated, June, 2026.
Frequently Asked Questions
Yes, and it works surprisingly well. The key is using a fine-textured instant milk powder rather than a coarse one, and following the temperature steps carefully. The end result is smooth, creamy, and tastes nothing like reconstituted powdered milk on its own.
Technically no, since powdered milk is already pasteurized, some people skip the heating step entirely and just mix it with hot water before adding the starter. However, heating it to 180°F and then cooling it down to 110°F produces a better texture and more consistent results, so it’s worth the extra time.
Yes, as long as it’s less than two weeks old. After two weeks the live cultures die off and it won’t properly inoculate your new batch. If your yogurt is getting close to that window, use a fresh store-bought yogurt with live cultures instead.
Grainy yogurt is almost always caused by coarse-textured milk powder, and switching to a finer brand usually fixes this problem. Runny yogurt means either the temperature dropped too low during incubation, the cultures in your starter were weak, or it didn’t incubate long enough. Adding a bit more milk powder to your next batch also helps thicken it.
Yes, and there are several methods that work well. A wide-mouth quart Thermos filled with hot reconstituted milk and starter will incubate on the counter for 24 hours without any electricity. An Instant Pot with a yogurt setting is another excellent option and produces very consistent results. A cooler with an inch of boiling water in the bottom and the yogurt container raised above it on an inverted bowl also works well.
It’s better not to. Hot water sitting in pipes and water heaters can harbor bacteria. Use filtered or boiled water that has cooled slightly, or bring your reconstituted milk to 180°F during the heating step to address any concerns.
Yes. Longer fermentation, up to 24 or even 36 hours, produces a more sour flavor and increases the probiotic content. It won’t hurt the yogurt; it just changes the taste profile. If you prefer milder yogurt, stick to the 6–8 hour window.
Want More Useful Info From Survival Mom?
The Final Word
Making yogurt from powdered milk is one of those skills that sounds more complicated than it actually is. Once you’ve done it a few times, it becomes second nature. It’s just a matter of mixing, heating, cooling, inoculating, and then waiting. That’s really it. And having a reliable method for making fresh yogurt from a shelf-stable ingredient is genuinely useful, whether you’re stocking a deep pantry or just trying to cut down on grocery runs. I’ve never gone back to buying it at the store.
I’ll definitely try this; but a word about powdered milk:
It is non-fat and is therefore only slightly more ooggie than fresh non-fat milk. I mean, who drinks non-fat milk for PLEASURE? Nobody. Now don’t get me wrong, I find whole milk very heavy and only use it for pudding and pastry cream, but even 1% is a world away from “white-water”, so comparison is unfair.
Powdered WHOLE milk (sorry about the caps, I can’t figure out how to italicize on my iPad. Tips?) is available from several online food storage sites and at any Walmart in a Hispanic-heavy neighborhood. I mix it with ooggie powder to get 1 or 2%. A single drop of vanilla per quart also helps a lot.
I order whole milk powder from Amazon. It is great for baking and I don’t have to worry about not having milk in my fridge. It is also good to have on hand because I notice that many recipes require milk to be at room temperature.
I can’t wait to use it to make yogurt.
Thanks for this recipe. I have been wondering how to make my own yogurt as I’m always buying it at the store. Can fruit be added to it and if so, when during the process could it be added? I have dehydrated fruit and was wondering if that would be good.
Kathy, I would not add fruit until you are ready to eat it. Adding fruit ealier in the process would affect the bacteria’s metabolic processes; fruit has all kinds of sugars and some has yeast on the skins. Introducing bacteria other than the kind you want to cultivate in your yogurt (specifically Streptococcus thermophilus and Lactobacillus bulgaricus) could spell disaster. For this same reason, the yogurt will keep for longer in your fridge if you store it plain
I also use powered milk for my yogurt. I mix it as for milk, but a little thicker, using very hot tap water…then I pour into a wide mouth quart Thermos (‘soup’ type) and leave on counter for 24 hours. No electricity, perfect yogurt!
Thank you for sharing this recipe! This was my very first batch of yogurt and I’m excited that I got anything solid at all; it feels like something magical happened in the crock pot last night! But the consistency is actually more like ricotta cheese, not smooth & silky. Could that be because I used the wrong kind of powdered milk? The only way I varied from your recipe was by adding half a cup of kefir in addition to the store-bought yogurt, which I did because I figured more cultures would be better.
Also, there were roughly two inches of liquid sitting on top of only about half an inch of solid. Is that normal? If so, I’d like to double the recipe in the future so we can get more yogurt. This is tasty but won’t last long. Thanks to anyone who can offer some insight!
Well, Martha, there are many reasons why your yogurt may have been grainy. I don’t have very much experience with kefir, but sometimes more cultures is NOT better. Yogurt requires two specific species of bacteria; it would be risky to introduce others, beneficial or no. The problem could have also lain with your starter yogurt, the milk powder you used, or the temperature being too high. The only way to really figure it out is to experiment. Good luck!
Yogurt makes an excellent addition to biscuit batter. Simply use a like amount of yogurt, or buttermilk, to your biscuit recipe, instead of milk. It makes wonderfully tender, high-rising morsels of tastiness.
I use yogurt instead of buttermilk, too! It’s difficult to find real cultured buttermilk unless you live in the American South, and even then it’s a lot pricier than plain yogurt. I used to curdle my own milk with vinegar or lemon juice, but I didn’t like the slight vinegary/ lemony taste it would impart to my baked goods. Yogurt has been my solution, and it has worked very well for me.
Hi Beth! I just saw this article today (reading through recent comments) and since you’re commenting on this older article as recently as today, I’ll chance asking a clarifying question. In the photos of the powdered milk texture, the one that says “NO” looks a lot finer/smoother/like sugar or flour to me than the one that says “YES”. Am I somehow misunderstanding this? Do we want the powdered milk to look like the YES or like the NO in the picture? Thanks so much!
Hello, Anne Marie!
Yes, you DO want powdered milk that is like the “YES” in the photo. Like powdered sugar, ultra-fine powdered milk tends to take on a clumpy appearance. You’ll also find this with flour; white flour tends to clump up a bit more than home-ground whole wheat flour. The “No” powdered milk appears to have finer particles because there are no clumps, but that is actually because it has a coarser texture.
Thank you so much for unconfusing me!
Any chance you tried it with powdered coconut milk?
I haven’t tried it with coconut milk or soy milk, but I would be very interested to hear how it turns out if you decide to experiment.
Hi Beth,
I made a batch of yogurt yesterday from powdered milk and the only thing I didn’t like about it was it could have set up a bit firmer, but it was good. My first try didn’t work out because I think my powdered milk was too old, so I bought some fresh. I did add a little sugar to one container and some strawberry preserves to another and they were both very good. I used 1-1/2 c of powder even though the directions on the package called for 2-2/3c to reconstitute. Would adding more powdered milk help with the set up? Thank you. Think I’ll be making more of this since I do eat a lot of it.
Kathy, I would definitely add more powder to improve the set; not all powdered milk is the same, so when it doubt, follow the directions on the package. The brand of powdered milk that I use only needs 1 1/2 c powder for 1/2 gallon, but if the brand you are using says to add 2-3 c for the same amount, you should do that.
For what it’s worth, Alton Brown’s yogurt recipe says to use 1% milk with an extra 1/2 c of powdered milk.
Hi, I found your Website a few days ago and today I decided to, finally, make yogurt from powdered milk. I eat approximately a quart of yogurt every week and often cook with it. I get 25.6 ounce bag of instant dry nonfat milk a month. According to the package instructions it takes 1 1/3 cups of milk added to 3 3/4 cups cold water. I decided to 3 1/2 cups of powdered milk and 2 quarts of water. It took 2 hours in my crockpot to reach 180 degrees, I put the crock in a sink of cold water and cooled the milk to 110. I inoculated the cooked milk with 1/2 cup of store bought yogurt. When I checked the temp it went down to 99 degrees. I turned the crockpot on low. My plan is to heat it to 110 degrees, unplug the crockpot and wrap it in towels and let it set for 8 hours. Since it will be about 2 in the morning I’m planning on sitting the crock in the frig until the morning. Do you think I’ve done this correctly? Did I use enough powdered milk? I really want this to work and any help from you would be much appreciated. Thanks…..
Hi, Vicki,
Well, the only real way to find out if it was done correctly is to see if you’ve made yogurt at the end! It sounds as though you’ve thought it out, so my opinion is that you have reason for optimism.
I’ve been trying this & I’ve found you don’t even have to sterilize the powdered milk first, I’ve just mixed it up with cold water and the yogurt’s been just as good, just as solid, as when I’ve sterilized. Powdered milk is dried out “pasterised” milk so that means it’s only been heated to 60C/140F but I’m guessing the drying out may kill the bacteria?
But I do use a hot water method for setting. Placing an inch or two of boiling water in a plastic 6-pack cooler with the yogurt container raised above the water on an upturned ceramic bowl.
2 cups of full-fat powder per quart makes the most delicious greek-style yogurt that’s just as good as shop bought.
Hi) I found your site today and am hoping that you are still checking it. Have you tried the powdered milk from the LDS Storehouse to make yogurt? What brands have you found to be the best?
Jolene, I’ve only used powdered milk from Thrive Life and Honeyville, so I can’t comment on the LDS Storehouse brand, but I imagine it’s very similar.
I have tried two different whole milk powdered milk and do like the rich taste.
I would like to make yogurt using the powdered whole milk. I have a pressure cooker, Instant Pot, that has a Yogurt setting.
Does powdered milk need to heat to 180 degrees first or can it be done the “cold start” method: milk and yogurt starter for 8 hours (no boil)?
I’ve been using your recipe for several months. I use a powdered milk from Walmart Canada. It looks like the NO milk powder but it works fine. Perfect yogurt every time.
I just saw this Sunday. I tried it, and have my yogurt today. It is fantastic! I added water from my machine to the powdered milk. Let it warm to the touch on my wrist like testing a baby bottle. Once it came down to temp, I added regular Greek yogurt. Mixing it with some of the powdered milk first. It worked great! No refrigeration needed until it’s done. Thank you so much for this great economical solution.
my gas range has a “bread proof” setting which works really well for my sourdough. It maintains the temp at around 100° as I understand it. Do you think this is a reasonable alternative to the beach towel? It’s cold here in Connecticut ;~)
Cindy, we have to run our air conditioner several months out of the year because we have a lot of humidity and it removes the moisture from the air. Consequently, I have a heck of a time finding a warm place in the house when I want to start a batch of yeast. I think that setting on your stove should work perfectly for this purpose.
OMG! This recipe worked BEAUTIFULLY the first time! I’m delighted. I’m a big fan of efforts that take a small amount of prep while the good stuff effortlessly happens over TIME. I work from home so I can manage the brief steps required at various intervals.
For this yogurt, I used store-brand powdered milk. We happened to visit a local dairy to buy some fresh plain yogurt so I used that as a starter.
I was making a sponge for sourdough pancakes anyway so I left the yogurt in the proofing oven along with the sourdough.
I can’t stand powdered milk so I am delighted to find that this recipe is perfect. Good flavor, good yogurt consistancy. I will continue to use it. Thank you!
hi Cindy , can you give the exact portions you use, amount of powdered to amount of water . ?? want to use my oven setting.
1 ½ c powdered milk
8 c water
(sorry this took me so long to find your question, Pam)
a) You don’t have to bring the mixed milk up to 180 degrees before making yogurt. This is the first step with regular milk to pasteurize it and kill the natural bacteria so the yogurt bacteria can take root. Powdered milk is already well-processed and doesn’t have anything left in it to kill off…
I just mix my powdered milk with hot tap water, stir in my yogurt culture, and go from there.
B) why would you mix it up and then drain it to make greek yogurt? Couldn’t you just put less water in to start with, since you’re starting with milk powder?
I haven’t tried this, so i dont know the ratio. I assume, however, if you’ve drained/strained yogurt to make greek yogurt before you could keep track of how much whey you drained off. Next time you mix the yogurt up, reduce your water by this much while leaving everything else the same. Should save you a step and prevent waste too???? (not tested. i’ll have to try that one! myself!)
also, i use a mix of whole milk and skim milk powders myself in varying degrees. or sometimes all whole… i can’t tell any difference in texture depending on the granular-ity of the starting powder, but I do like this quicker yogurt making method. it was great during the pandemic instead of going out for fresh milk all the time!!
Thanks for sharing this recipe!! it was my jumping off point to a whole new level of easy yogurt making!!
I’ll be trying with powdered milk soon.
Having made yogurt weekly for several years now I’ve found inconsistencies with cultures and sometimes they age leading to thinner set. Tastes fine but are more on drinkable spectrum.
My remedy has been to add a quality plain beef gelatin. Hands down amazing help to texture and creaminess.
I make 2 quarts a batch. Once milk is brought to temp, I remove about a cup and cool it in fridge to at least 45-50° in a jar with a sealable lid.
Once cooled I add 2-4 tsp of gelatin put on lid and shake vigorously. Break up any clots with a fork and shake some more. You’ll have to figure out amounts as you go. Not all gelatin the same so start with a little. Never put gelatin in warm/hot milk as it clots up.
I add this mix with my culture mixture and wire whisk for few minutes. I strain into another pan through simple mesh basket screen for solid bits. I fill pint Mason jars and set in my dehydrator to incubate.
Side experiment… you can make cold crushed fruit set with gelatin and put in bottom of individual cups before your milk/yogurt on top before you incubate.
Note on reconstituted milk from hot tap water. From my old school plumbing and maple sugaring days… Do Not Use hot tap water for reconstituted anything unless you then bring to 185° to kill off possible bacterial growing standing in hot water pipes and tanks.
With so many municipal water issues in this country … be careful. From 35 years of canning syrup (or anything for that matter) 185° is the temperature to aim for to kill bacteria.
What if the final yogurt rests MORE than 6 – 8 hours before refrigerating?
The timing of this batch means that I’d have to wake up in the night to put it in the refrigerator. If it’s allowed it to rest in a warm place longer than 8 hours, will it just become more sour tasting?
I ferment my milk for 36 hours. It will be more sour, it will also have many more health giving probiotics.
That’s a great idea! Maximizes the benefits with little effort. 🙂
In my homemade yogurt, I always use whole milk or 2% milk, with additional powdered milk to boost the calcium and protein. But last night I used non-fat powdered milk, only (five cups). I added four tablespoons whole milk yogurt and one capsule of Biokult probiotic. I am super fortunate to have a Cuisinart yogurt maker that I bought second-hand and I let it “cook” for 15 hours. It seemed a little thin at first, but nearly perfect after it was refrigerated. I used the plain old Walmart brand (Great Value) powdered milk and measured 2 cups + 2 tablespoons to 5 cups of water. I took the advice from a post above and boiled the water first, then let it cool to room temperature before I added the powder. I’m over the top thrilled with the results. Never dreamed it would turn out so well.
That’s terrific, Gigi! Thanks for sharing your results!
I have been making homemade yogurt for about two years with whole milk. Love making homemade yogurt! The liquid that results at the end of the process is called whey and I use it all in other cooking (I strain the yogurt using coffee filters and a colander because sometimes it is runny). I use the method described here with one exception – after the milk had cooled to 110* and added the yogurt starter, I wrap the crock pot in a towel and put it the the oven with the oven light on for about 12 hours. Thus I do this at night and wake up to great yogurt. I am excited to learn from this post, that I can make yogurt from powdered milk! I am going to try that. Also, thanks for the tip on getting a starter from a cheese factory. All this information has been very helpful. Thank you.
Thanks for sharing! Let us know how it goes with the powdered milk!
Hi. Just tried this method of making yogurt. It works, and it’s tasty! Sorry but i really don’t like powdered milk. Used whole milk powder and goats milk powder and cut the amount in half. I am so excited, the goats milk gives it a little more twang and it makes wonderful tzatziki. Thanks again!
can you carry a cup from dry milk batch to dry-milk batch, ongoing for a while (ie: if milk becomes otherwise unavailable or hard to obtain)
______
we were raised on a tight budget with nonfat dry milk, and my mom used to make yogurt in the 5 cup Salton yogurt maker, and it was good; much better than drinking dry nonfat milk 🙂
currently I use whole milk gallon & add a pint of heavy cream, using a chest cooler with an aquarium heater set around 90 (with my kombucha brewing jars) 24-30 hours later: it’s heartily approved around the house!.. straining that and adding 2-pinch of salt makes a nearly cream-cheese product.
_______________
`hope someone can address the carryover without fresh milk; however long that can be done, or if I’ll need to obtain the occasional store-bought fresh yogurt cup to boost/revitalize a culture.
Thank you!
If you’re debating whether to get a yogurt maker or an Instant Pot, go with the Instant Pot!!! A yogurt maker makes yogurt. An Instant Pot makes soups, stews, tender and juicy chicken and turkey, hard boiled eggs …….and lots more. I’ve been using my IP to make yogurt for years and have never had a batch go wrong. The same could be said of the yogurt maker I had before the IP but, like many yogurt makers, it didn’t make large enough batches. It also wasn’t prepared to run for 24 hours without monitoring, which I do to make my yogurt more digestible.
P.S. If you like Greek yogurt, no problem. I tried straining yogurt through cheese cloth and ended up with yogurt everywhere except but the kitchen light fixtures. There are strainers made just for yogurt and they work like a charm.