


Your backyard can be so much more than grass and a few tomato plants. Here is a full plant-by-plant guide to building an edible landscape, perennials that keep producing without starting over each year. It covers what to plant and when, growing zones for every plant from asparagus to olive trees, options for shady yards, and a 3-year plan for what to plant first so the slowest producers have time to pay off.
Every March, I get spring fever and can barely wait to get outside and start transforming my backyard from dead winter plants into something lush and green. A couple of years ago, I decided to go a step further and work on creating a backyard that was not only beautiful but edible as well.
Annual plants are great, don’t get me wrong. I love them for their bright colors and variety, but I started choosing more perennials instead. Each spring, the yard comes back on its own and starts producing again, and I get to add just a little more to it than the year before. I don’t have to start from scratch every spring, and it means I can still be planting food-producing plants in late summer and fall, long after the annual garden has wound down.
My regular vegetable garden already has the basics covered, since I always plant tomatoes, cucumbers, peppers, and melons. What I wanted was even more fresh produce for a family of four, without adding a lot more work. That’s how I landed on an edible landscape. A lofty plan, to be sure, but here’s how it came together.
This article has been completely rewritten by Lisa Bedford, September 2026, with new plants and a step-by-step 3-year plan.

Some of the links in this post may contain affiliate links for your convenience. As an Amazon Associate, I may earn a small commission from qualifying purchases without any increase in price to you.
In this post
- What is an edible landscape?
- Planning an edible landscape — Getting started
- What to Plant
- Want more useful info from Survival Mom?
- How long will it take to make my yard edible?
- A Sample, 3-Year Plan
- A word about accessibility
- Get my free gardening self-assessment!
- FAQ
- Related Homesteading Content
- Final Thoughts
What is an edible landscape?
When I say “edible landscape,” I just mean filling your yard with food-producing plants instead of only flowers and ground cover. In my case, this works alongside my Square-Foot-Garden-style boxes, not instead of them. I’ve tried to combine the best of both worlds but leaning more towards plants that will provide us with things we can eat.
A well-planned edible garden starts the spring season with pretty spring foliage and later in the summer, I have a nice harvest. It’s the best of both worlds. If you plan wisely, you can harvest one food or another over several months.
Planning an edible landscape — Getting started
Before you buy any plants, it helps to have an understanding of what your growing area can support in terms of things like sunlight, water, draining, and soil.
Spacing. Different plants need different amounts of room, and a plan on paper tells you how many actually fit in a given area before you commit. Airflow matters, too. You’re planting this edible backyard to last season after season, so this is one of those considerations you can’t afford to overlook. Crowd plants together, and they’ll fight the plants around them for sunlight and air space all season long. It’s a lot easier to give a plant the right space from the start than to dig up a struggling, overgrown one two years in. Containers help here too. Not only does a variety of pots adds visual texture and color to the yard, it also keeps spreading plants like mint from taking over everything around them.
Lighting. Plant perennials where they’ll get the sunlight they need because the best way to make sure a food-producing plant never produces food is limited sunlight. A simple sun-and-shade map of your yard, even just walking around and noting which spots get sun at different times of day, will tell you where the best and worst growing spots are.
If you’re using containers, move them around until you find the right spot. I call this “sun-spotting”. Remember that as summer sets in, your deciduous trees fill in with leaves, so a sunny spot in April can turn shady by July. Dwarf trees are a good workaround since they do well both in the ground and in large pots.
Pollination. Know which of your plants are self-pollinating and which need a partner nearby to actually produce fruit. Adding plants that naturally attract pollinators is a good way to do this naturally.
Grouping. Picture what your plants will look like fully grown, not just today. Will they crowd each other out? Will a taller plant eventually shade out something low-growing that needs full sun?
Zones. Stick to plants that can survive your climate. What thrives through a Minnesota winter won’t necessarily make it through a Texas summer. The USDA’s interactive hardiness zone map is the fastest way to check yours, and your county extension office can tell you about microzones specific to your property.
Design. Fruits and vegetables don’t have to live in one designated garden bed. Use your whole yard. I group pots together in varying sizes and heights to give my backyard a lush, full look.
Label everything. Little green seedlings all look the same. If you’re startring from seeds or seedlings, label as you plant, so you’re not guessing which one needs more water or less sun from week to week.
Get creative with borders. One of my favorite tricks for a simple and frugal border is to turn concrete blocks on their side, holes facing up, filled with potting soil and planted with something bright — annuals like marigolds, impatiens, verbena. This is a good way to work in colorful annuals. A bonud is that those particular flowers also help keep deer and other wildlife from devouring your harvest.
Keep track. Sketch what you planted and note what worked, what didn’t, and why. Be willing to move things around once a plant stops producing.
Show up. Spend time in the garden even when summer gets brutal. I get outside most mornings just to check on things and can quickly spot an infestation of pests or see where squirrels have been eating away at one plant or another. How well your edible landscape does is directly tied to how much attention you actually give it.
What to Plant
Which perennial edibles should you plant? Veggies first!
The following is a list to help you build your edible yard year after year, without starting over. They’ll provide food for your family and and give you plenty of fresh produce for eating and preserving. Check out these vegetables, first.
Artichokes
In the norther part of the country, artichokes are often used as an annual, but with mulch and protection from the cold, they can return in the spring. If you let a few go unharvested, you’ll get tall, spiky, purple blooms that create an eye-catching border.
Asparagus
This perennial can take up to 2 or 3 years for to produce a sizable harvest, so the best time to plant asparagus was 3 years ago. The next best time is right now!
Garlic
This is one edible landscape plant that can be planted in the early fall through early winter. Rows of green garlic stalks add height to a bed while they’re growing, and by harvest time you’ll have a batch of fresh garlic that’ll last you months.
Lettuce varieties
Lettuce was always just a salad ingredient to me, until my kids spotted a rainbow of leaf colors on a trip to Disney World. There are dozens of ornamental varieties with beautiful color and texture. Lettuce also does best in shade, which makes it useful for filling gaps between seasons and stretching your harvest into the colder months.
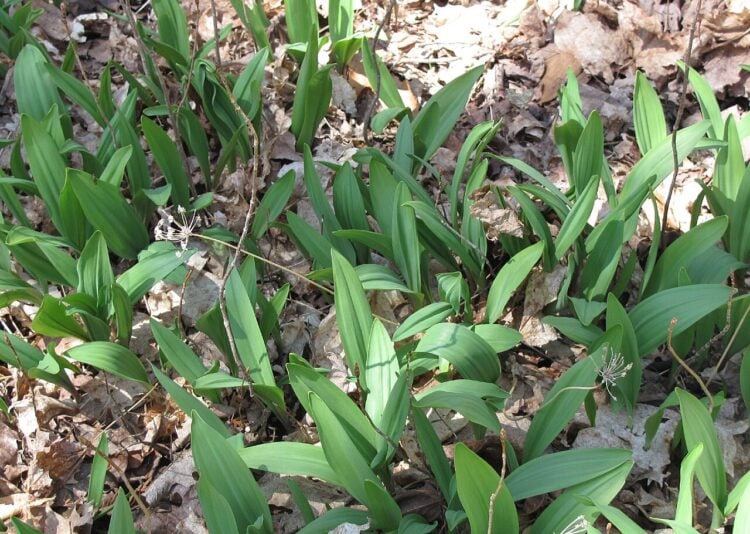
Wild Leeks (shade)
This edible perennial works well as a border around trees and often thrives off the organic nutrients from fallen autumn leaves.
Roots and rhizomes
Ginger
Grows well in USDA zones 7–12, and can tolerate colder zones with heavy mulch or container growing brought indoors for winter. It prefers partial shade over full sun, making it a good fit for the shadier corners of a yard or around the base of a deciduous tree. The rhizome is the edible part, harvested from the soil rather than picked off a plant.
Turmeric
Similar to ginger, it does best in zones 8–11 in the ground, though it grows well in containers as far north as zone 5 if you bring it indoors for winter. Also prefers partial shade to full sun and needs rich, well-draining soil. It’s ready to harvest 8-12 months after planting.
Horseradish
Remember that it’s the root of this perennial that you want, so give it its own dedicated bed. That way you won’t damage surrounding plants when it comes time to harvest the horseradish root.
Ornamental, leafy greens & herbs
Herbs
I think a backyard filled with nothing but herbs is a grand idea, and there are so many varieties, you would never get bored! Lavender, basil, oregano, thyme, roseRo
Sorrel
This is another plant that works well as a “filler” in your garden space. It can grow in either sun or partial shade and comes back every year.
Perennial fruit plants
Berry Bushes
All berry bushes love sunlight and can do very well in large pots.
- Blackberries & Raspberries – Both have a long harvest window and will spread and fill in a border on their own once established. Full sun, well-drained soil.
- Blueberries – A good pick because they’re low-maintenance once established and give you something across three seasons. Pretty flowers in spring, fruit in summer, and color in fall. Need acidic soil and full sun.
- Elderberry – If you’re in zones 3-9, add this one to your edible landscape. Not only is it a fast-grower, but it also attracts pollinators and the berries are versatile with medicinal properties.
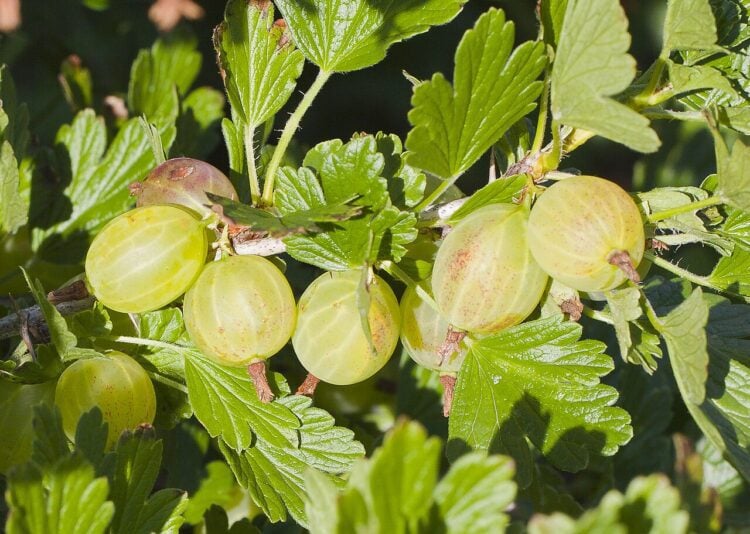
- Currants and gooseberries – While most every plant in this list does best in full sun, currants and gooseberries are among the few fruiting shrubs that actually produce well in partial shade. Zones 3-8.
Cranberries
Useful as a groundcover in a spot nothing else handles well, but need a consistently damp, acidic soil, zones 2-7. Full sun to partial shade.
Grapes
Add a wall of greenery in a sunny location when you plant a grape arbor. Include these in areas where you’d like vertical coverage. A trellis or arbor turns an unused fence line or wall space into a food-producing crop. This one needs full sun.
Pineberries
Mostly worth adding for variety, since they grow like a strawberry but taste different. Same conditions as strawberries: full sun, well-drained soil.
Rhubarb
A reliable, low-effort perennial that comes back on its own year after year. Only the stalks are edible. The leaves are toxic. Needs full sun to partial shade.
Strawberries
I recommend strawberries (zones 3-10) for their adaptability. Use them as a border in your garden beeds or in containers. They’ll need n easy, high-yield choice for edging beds or containers. Full sun, though expect some competition from deer and rabbits.
Add trees to your landscape
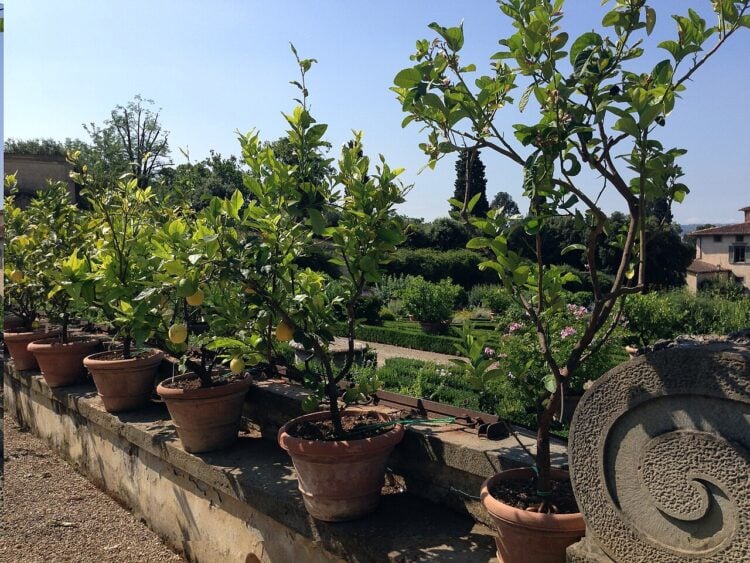
Citrus Trees
There’s nothing quite like a fresh orange or lemon picked fresh from your own trees. These have a bright green foliage year round and, depending on your zone, can grow directly in the ground or in containers. Check out dwarf varieties that can be grown in greenhouses or in pots you can transport indoors during the winter. They need full sun.
Fruit Trees
Every climate can grow a type of fruit tree. You just need to research and find the specific variety that will produce fruit in your zone. These are all great additions to your edible backyard because just one mature tree can produce a significant amount of food, year after year.
The type you choose depends on the zone. Apples and pears do best in zones 3–8, peaches and plums in zones 5–9, and figs in zones 7–10. If you want a tropical crop, like bananas and papayas, those do best in zones 9–11 or container growing elsewhere. They will all need full sun, and plant only as much as you can realistically eat or preserve since fallen fruit on the ground attracts all kinds of pests and can become a maintenance problem.
Nut Trees
One good tree, walnut or pecan especially, keeps producing for decades. Zone range varies a lot by type. Pecans and walnuts do well in zones 5–9, chestnuts in zones 4–8, almonds in warmer zones 7–9. Plant them where they’ll get full sun, well-drained soil, and plenty of space. Your county extension office can help you identify the specific varieties that grow best in your area.
Hazelnuts are another option, if you really want to add a nut-producing plant. They grow as a large shrub rather than a full tree, so they fit in smaller yards. Zones 4-9.
Olive Trees
These are beautiful trees with unique looking trunks, small green leaves and olives that change from green to purple as they mature. However, it’s also a very messy tree and has a narrow growing zone. They need a cool winter to set flowers but can’t survive a hard freeze. This limits their in-ground planting to zones 8-10. In other zones, it can work well as a container plant, but depending on one for a crop of olives is a bit iffy. And, remember, olives need to be cured before they’re safe to eat.
Want more useful info from Survival Mom?
How long will it take to make my yard edible?
Developing an edible landscape is a long, slow process that is built upon each year.
Do not try to plant everything at once or get frustrated that all your efforts still have years to yield results. Keep in mind that many perennial plants may take two to three years to develop a strong root system and become established enough to grow and flourish. Berry bushes and asparagus are two such examples.
Fruit and nut trees could take even longer as they need several summers to reach their full potential.
However, the longer you wait, the longer it is before harvesting can begin.
Start now and add a little each year. Your edible yard will be a rewarding and tasty accomplishment in a few short years. This way, you can become increasingly self-reliant and confident as a gardener and have a supply of fresh food.
A Sample, 3-Year Plan
If I were starting from scratch, with decent soil and an established watering system in place, this is what I would do to create my own edible backyard.
First, plant your slowest producers first. A fruit tree that takes three years to bear fruit costs you the same three years whether you plant it now or later. So the earlier you get slow-maturing plants in the ground, the sooner you’ll get food to harvest. Fast producers can be added any time and still pay off quickly, so they fill in around the slow ones rather than leading the plan.
Keep in mind with this plan that each plant choice depends on your own growing zone as well as any microclimates on your property.
Year 1: Start the foundation
Plant the slow starters immediately, since delaying them just delays your harvest:
- Asparagus. This takes 2–3 years to produce a harvest, so this needs to go in now regardless of anything else
- Fruit trees (apples, pears, peaches, etc.) Most take 2–4 years to bear fruit.
- Nut trees, if you have the space. These are the longest-term investment on the whole list and often take more than 4 years before yielding any nuts.
- Grapes, like fruit trees, they’ll need a year or two just to establish roots and a basic framework before they’re ready to train on a trellis or arbor.
- Berry bushes (blueberries, blackberries, raspberries). Another slow producer, they usually take 1–2 years to production.
- Citrus or olive trees, if you’re in the right zone or planning to grow then in containers. Both are slow to establish.
Alongside that, plant your fastest, lowest-risk plants for quick wins and to keep momentum while you wait on everything else:
- Herbs. Easy to grow as long as conditions are right (mostly sunlight), and they’re productive almost immediately. Plant in containers or in the ground.
- Lettuce varieties. These grow and produce fast and are useful for filling in gaps while trees are still small.
- Strawberries. Even in their first year they can produce a modest harvest.
- Garlic. Plant this in early fall and you’ll have a harvest by early summer of Year 2
During this stage, do the planning work now, not later after you’ve invested much more money, time, and effort only to discover many of your plants wil never produce food due to lack of sunlight, poorly draining soil, etc. Now is when you need to do sun-and-shade mapping, check your hardiness zone, and sketch your layout on paper. This is especially important for any trees you plant, since they aren’t easy to move to a better location, unlike lettuce or strawberry plants.
Year 2: Harvest and expand
An old farmer once told me, “It takes ten years to get to know your land.” This is so true — and you’re only on year 2! So, in this next phase, continue learning, observing, and expect that at least a few things you plant won’t thrive.
Harvest your Year 1 fast producers. These are your strawberries, herbs, lettuce, and your first garlic crop. Pulling up those first garlic cloves, filling a basket with home-grown basil and mint — it’s so rewarding that you’ll be even more motivated to continue with your plan.
Now, add the rest of the perennial vegetables you want to grow. Plants like artichokes, horseradish, sea kale, sorrel, wild leeks. These aren’t urgent to plant in Year 1, but they’re low-risk and fill out the landscape while your trees are still maturing
Expect first real berry harvests from anything planted in Year 1, especially blueberries.
Start training and shaping grape vines onto a trellis or arbor.
Reassess your sun map. This is the year deciduous trees planted last year (or already on your property) start filling in. This is important so you’ll know what you can plant in the area beneath the tree as it fills out.
Year 3: Maturity and more expansion
This is the year your vision should be coming into full fruition, no pun intended. It’s going to be an exciting and fulfilling season, but possibly with some disappointments and pivoting to other plants or planting areas when you see a plant struggling to survive in its current location.
Asparagus reaches full harvest . This is the payoff for planting it in Year 1
Fruit trees may produce their first real crop, depending on variety. As they produce, you might need to find ways to protect the fruit from birds, in particular.
Berry bushes hit full production
Review what worked and what didn’t. This is where the “keep track” habit from planning pays off. Move or replace anything that’s underperformed for two seasons running. You have to harden your heart and not be emotionally attached! Most experienced gardeners have had to learn that lesson! Sometimes you have to just pull out that plant, heave it into the compost pile, and come up with a Plan B for that space.
Expand into the decorative/structural layer now that the food-producing backbone is established, what can you do to make your entire garden area more beautiful with things like colorful containers, annual flowers planted here and there, a few perennials to attract pollinators, and garden decor. Your edible garden isn’t just for food. You also want to spend time there in a relaxing chair with your feet up, sipping on iced tea, and just enjoying the beauty you’ve created.
Consider your next slow investment. Ths might be nut trees or olive trees or even adding some hardscape, like a flagstone walkway or upgrading your gardening containers.
A word about accessibility
As I’ve grown older, I’ve looked for ways to continue enAard are easy to reach, manage, and harvest.
I use quite a few pots and raised beds. These allow me to avoid a lot of kneeling and crouching. Also, I can vary the size of pots, which makes it easier for me to move them around to sunnier spots. When we have cold autumn evenings, bringing them inside is easier.
I also have a couple of rolling plant dollies for heavier pots, and selecting smaller varieties of fruit trees helps ensure that I’ll be able to reach the ripened fruit. For my smaller pots, I’ve purchased a few decorative plant holders that allow me to place pots at waist level and higher, allowing me to take care of my plants easily.
Get my free gardening self-assessment!
You can make your next garden your best garden ever, and this assessment guides you each step of the way! Click here to request this free PDF, ready to download and use.
FAQ
Absolutely consider using wild and foraged plants to enhance what you are already growing. Read the article How to Enjoy Wild Violets for Food and Medicine for ideas as these little beauties pop up all over the country.
Before you eradicate any weeds, check to ensure they’re not edible! Many plants in our landscape are edible, and many have medicinal properties. It’s worth taking the time to learn how to identify them.
Sooner than you’d think, if you plant right and manage your garden. Herbs, lettuce, and strawberries can give you something to eat in the first year. Berries usually take a year or two, and asparagus needs a full two to three years. Fruit and nut trees can take even longer.
Currants, gooseberries, lettuce, and some herbs are your best bet. Most everything else on this list wants at least partial or full sun, so a shady yard means your choices are limited.
Herbs. They’re forgiving of mistakes, they’re productive almost right away, and hard to mess up badly enough to lose the whole plant. Lettuce and strawberries are a close second place. If you’re nervous about committing to a tree or a bush yet, start with these and build confidence before you invest in something that takes years to pay off.
You can absolutely do this in a small yard. Dwarf fruit trees exist for nearly everything on this list, containers work for most everything on the list, and shrubs like currants, gooseberries, and hazelnuts take up far less room than a full-size nut or fruit tree.
Related Homesteading Content
- First Steps to Setting Up a Micro Homestead
- One Woman’s Story of Creating (& Loving) A Suburban Homesteading Lifestyle
- Budget-Friendly Backyard Farming: Tips & Tricks
- Beekeeping For Beginners
Final Thoughts
An edible landscape doesn’t happen in a weekend, and it doesn’t happen by accident, either. It starts with a plan — knowing what your growing area is like and what it can grow best, and then selecting plants that are most likely to thrive and produce food. It also requires more than a little patience, but if you start now, you’ll be harvesting actual food before you know it!
Have you considered transforming your backyard or front yard into a food-producing edible garden?
This article was originally published on March 22, 2019, and has been completely rewritten by Lisa Bedford, September 2026.
If I might add, consider planting winter/walking/egyptian/tree onions (they go by several different names). They are among the first plants in my yard to show signs of life in spring, and they self-sow via top sets.
The book edible perennials and edible forest gardening (esp volume 2) are a WEALTH of information on this topic!! Love your ideas, survival mom, keep up the great work!
Sorry, that first book I was thinking of is actually called perennial vegetables, by Eric toensmeier, and the edible forest gardens book is by Dave Jacke.
hey this is Vince with disaster survival magazine we are doing a special edition about women preppers, we have survival jane and many others on board we would very much like your input and for you to contribute an article. Please let us know if you have any ideas for articles. We love your website by the way.
Thanks,
Vince
If you have room, a stand of Jerusalem Artichokes would be great. They look like Sunflowers, and have potato
like roots that are good for Diabetes, and are good food for all… I’ve heard they can be invasive, though
I’d love it if my Jerusalem Artichokes go invasive, more free perennial food in my garden! 🙂
Hello
what would you plant to espalier along a water tank facing north east. Gets very hot
How do I plant up raspberries and what do to do with a pear that has multiple leaders
regards Kerry
I would try Maypops at your water tank. It’s ok to prune a pear to an open center vase shape to accommodate your multi leaders. I would buy thornless black raspberries, they are ok in part shade and clay soils. Need to trellis or cut half stalk in fall.
I knew I could count on my readers for even more suggestions! Thanks!
I LOVE this article!!! Thank you for the great ideas now floating around in my head. The past 2 summers have been challenging with the enormous amount of landscaping and limited amount of time we have each summer. I’ve had a bug to seriously cut back and redo our landscaping next spring. This is my new plan!!!! Everything we plant will be perennial edibles that look gorgeous. Plants that serve a purpose!!!
Do you have any books or printable guides that you could recommend to know which plants I can grow in my area? I’m in Zone 5B
I love your blog and noticed you have a kindle book. Will you also have a hard copy I can add to my library? Your gardening tips are the best I’ve found. Thx for sharing with us.
Hi Vicky! Thanks for the very kind words. Both my books are in paperback: Survival Mom and Emergency Evacuations. I’ve written a handful of ebooks that are occasionally part of a bundle sale, but for now, those are just in ebook form.
When we bought our house we decided to have mostly landscape plants that were edible. We have moringa, sea grapes, katuk, citrus, cranberry hibiscus along the back border. More citrus, moringa, loquat, acerola cherry trees as specimen and side border trees. We don’t make a big deal about it but it looks nice, attracts wildlife and provides us with fruit & greens we can’t buy at the store. We fill in with ground covers of colorful sweet potato vines, nasturiums, marigolds which are all edible and grow year round as we are in south FL. All of this also complies with HOA rules which highly discourages edible gardening in the front of the house.
Your landscape sounds lovely, Bellen. As you describe, it seems HOA rules frequently conflict with good stewardship of resources. Glad you found ways to be compliant and still achieve additional food-growing power.
I can’t believe you didn’t mention ELDERBERRIES, with all their medicinal properties. They grow wild everywhere, but if you plant or transplant and take a little care of them they grow crazy prolific. We started with 4 nursery stock, and they put out shoots near their trunk and we have transplanted lots of them. They are so…..ooo..oooo good for you. The syrup is just like Sambucol which sells over the counter in drug stores for $3 per OUNCE. We make quarts and quarts and give it away. Also makes “tincture” with 100 proof Vodka, keeps forever just like a bottle of liquor but truly great respiratory, cold and flu medicine. If you can’t use them all you can trade for other edibles with your neighbors.
Elderberries are an excellent option, Steve. I have to be very careful of things that might interfere with my thyroid medication, though.