

On Day 3 of flooding after Hurricane Harvey, I told my kids to get their emergency kits ready by the back door. The rescue-by-boat announcement the night before had been for people just a half-mile away, and reality hit fast. That experience is exactly why I put together this five-step evacuation plan, because when the moment comes there’s no time to think, only to execute. This covers animals, personal necessities, securing the house, documents, and the vehicle, plus step by step, how to run an actual timed drill with your family before you ever need it for real.
An emergency evacuation might be the most terrifying thing you and your family will ever experience. You feel the rush of adrenaline; there are so many decisions to make, and the kids are panicking. What should you pack? Where should you go? What about the pets? In this guide, you’ll learn the answers to those questions and have the knowledge to create your own evacuation plan, should you ever need it.

It was Day 3 of the flooding following Hurricane Harvey that I finally told my kids, “Get your emergency kits ready to go by the back door. We may have to leave if the flooding gets any closer.”
Day by day, hour by hour, floodwaters had crept closer to our neighborhood. One street at a time was reporting flooded cars and homes, and I was starting to think we would be next. After all, just the night before, we had heard the radio announcement, “Residents, get on your rooftops, wave something white, and wait to be rescued by boat.” That announcement was for people just a half-mile away, and reality hit me hard. We could easily be next.
Some of the links in this post may contain affiliate links for your convenience. As an Amazon Associate, I may earn a small commission from qualifying purchases without any increase in price to you.
In this article
- Why Every Family Needs an Evacuation Plan
- 1. Start With a Family Planning Meeting
- 2. Identify What Could Force You to Evacuate
- 3. Choose Primary and Backup Destinations
- 4. Map Multiple Evacuation Routes
- 5. Assemble and Maintain Go-Bags (Bug-Out Bags)
- 6. Create a Family Communication Plan
- 7. Plan For Pets Ahead Of Time
- 8. Have Your Transportation and Fuel Preps Ready
- 9. Prepare the House
- 10. Practice and Review Each Year
- Finally, Review The Evacuation Dry Run
- Frequently Asked Questions
- In Summary, The More Options The Better
Why Every Family Needs an Evacuation Plan
I lived in Phoenix for most of my life where rainfall is rare, earthquakes never happen, and a tornado only occasionally. But when a household project went very, very wrong with toxic fumes making it hard to breathe, we suddenly had to grab the kids and dogs and run.
Planning for an emergency evacuation never crossed my mind, and we were totally unprepared. Now, living in hurricane country, I’m very familiar with the concept! The fact is, there are numerous reasons why you might suddenly have to temporarily abandon your home. Severe weather and natural disasters can endanger your home and family, but there are other events that can force you out faster than you’d expect. Chemical spills on nearby highways, wildfires, long power outages that endanger the health of your loved ones, gas leaks, or even civil unrest can all create a scenario where home is no longer the safest place.
1. Start With a Family Planning Meeting
Sit down together (include all ages, even younger kids) and explain why this matters without scaring them. One way to do this is with a recent or current scenario like a hurricane in the news, and ask, “What if our family suddenly needed to get to a safer place?”
Older kids will understand immediately, and then it’s very age-appropriate to talk about the most likely scenarios for an evacuation. No need to bring up anything apocalyptic or completely in the land of fiction. This planning needs to be rooted in reality because that’s what you’ll be dealing with — a river that keeps rising, smoke coming from a fire in the oven, a chemical spill on the highway or a winter-time power outage where the temperature inside is close to reaching a danger zone.
2. Identify What Could Force You to Evacuate
Identify Triggers: When Will You Leave?
This is always a sticky point because it can take time to get everything loaded in the car and the house locked down, and most people aren’t eager to do that if the emergency fizzles out and they have to turn around and unpack everything. And yet, this is a critical piece of your plan.
Decide ahead of time the clear “go” signals so there’s no debate in the moment. When the floodwaters from Hurricane Harvey reached a neighborhood not even half mile away, that was our trigger — have the bug out bags ready to go, make sure the dogs crates are handy, and so on.
Your own “go” signals might be mandatory evacuation order from local officials, rising floodwaters near your neighborhood, loss of power with more storms and bad weather on the way or indoor temperatures reaching dangerous highs or lows, depending on the season.
Set a “72-hour rule” or similar. For example, if the utilities (power and/or water) are out and weather forecasts aren’t improving within the next 72 hours (3 days), you leave.
3. Choose Primary and Backup Destinations
Having a list of several safe destinations will help your evacuation Frantically trying to find a place to stay when everyone is hungry, fearful, and needs a bathroom is not the best way to do an emergency evacuation! Here is a plan to help you identify safe place
Primary: Out-of-area family/friends. This is, by far, the easiest way to go. Other than helping with groceries and maybe a thank-you gift, it will be cheapest and being around family and close friends is a great stress reliever. Do check to see where these homes are along your route. If one is closer to the coast and a hurricane is coming in, for example, then have other locations in mind.
Backup 1: Hotels are a great option, especially if they have a pool and free breakfast. They can book up fast, however, so make your reservations quickly but also note their cancellation policy.
Backup 2: If you have camping equipment and everyone loves the great outdoors, this can be a good option. It will be cheap and less likely to fill up if thousands of other people are also evacuating. Have a list of possible campsites along different route directions and a list of their websites to make advance registrations.
This list of possible, last-ditch evacuation locations will give you some creative ideas you may not have thought of.
4. Map Multiple Evacuation Routes
Use Google Maps or a paper map to plot routes moving away from your home, going in different directions — north, south, east, and west. If a wildfire is approaching from the north, you want routes heading away from it. Same process for hurricanes or if winter storms typically approach from one direction or another.
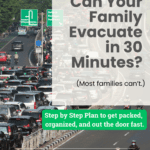
Establish a primary route first. This will be the easiest and most convenient one, such as getting on the nearest freeway. Of course, this will be the same route everyone else will be on and highway gridlock is miserable. That’s when having additional routes planned is vital.
To figure out your secondary routes, check local or state emergency management websites, FEMA, or Red Cross for designated evacuation routes. That will quickly give you some options other than major freeways. If they’re more rural, obscure routes, make sure you’ll have access to gas stations, food, hotels, and so on.
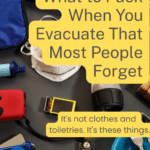
5. Assemble and Maintain Go-Bags (Bug-Out Bags)
Once packed, this is one prep you can set and forget because most of its contents are items that don’t expire or need much attention. You don’t really need to check up on a Swiss army knife, portable water filter, or a collapsible drinking cup!
Just check and rotate the food, medications, and batteries every six months (or when daylight saving time changes) and you’re good to go. When you think an evacuation is imminent, have each person add some clothing to their bags — 2-3 days of clothing changes and an extra pair of sturdy shoes. For adults, this isn’t as important as it is for growing kids.
- Essentials for each person:
- 3–5 days clothing, sturdy shoes, rain gear.
- Personal medications and copies of prescriptions.
- Cash (small bills), ID copies, insurance cards.
- Water (or purification), non-perishable snacks like protein bars, packets of nuts, trail mix, hard candies
- Hygiene items, an extra pair of glasses/contacts
- Kid comfort items (small toys/books)
- Charged power bank with cord
- Family extras in a larger backpack or rolling suitcase
- First aid and meds kit
- Important documents in waterproof bag (passports, birth certificates, insurance cards, etc.)
- This is where a Grab-and-Go Binder comes in handy with everything important all in one place.
- Small battery-powered radio in case phone lines are down and you need information
6. Create a Family Communication Plan
Designate an out-of-state contact person everyone calls/texts first. This alleviates stress from missed calls and wondering where everyone is.
Use apps like Life360, Zello, or pre-set group texts. A complete family emergency communication plan utilizes both high-tech and low-tech to give you lots of layers and options to ensure everyone stays in touch.
7. Plan For Pets Ahead Of Time
There are so many unnecessary tragedies that involve beloved pets in the aftermath disasters, and if they’re part of your family, this needs to be part of your planning.
Bugging out is difficult enough for human family members, but the excitement, fear, and flurry of activity will be highly stressful for your animals. You don’t need them underfoot or terrified they’ll escape your home or backyard as you rush around, so a first step will be to put them in crates or carriers.
One or two people in the family needs to be assigned the step of packing up each pet and their supplies and transporting them to your vehicle. This is ideal for capable, younger children as it gives them something to focus on, alleviating their own anxiety for a time, and takes care of an important task.
Each crate or carrier should be packed with enough pet food to last at least 3-4 days, a food/water bowl, something soft that smells familiar like a small blanket, a leash, ID tags, and anything else your pet requires, like a loved toy. Add a few treats or something to chew on, and your pet evacuation kit is ready. Here’s a plan for a pet emergency kit you can assemble now and always have at the ready.
Be sure to practice getting your pets into their carriers several times so this is familiar. Give them a treat each time so it’s something they look forward to!
If you’re the proud owner of fish, reptiles, rodents, and/or farm animals, consider whether or not you’ll take them along, leave them on their own with a plentiful supply of food and water, or transport them to another location. Have a Plan B for their care in case circumstances suddenly change. For more specific tips about evacuating “the big guys”, read this article written by one of our vet authors.
One final, vital step is to research pet-friendly hotels, campgrounds, and other potential destinations. The LaQuinta hotel chain has long been pet-friendly, but check the website of specific hotels along your evacuation route.
Other hotel chains that aren’t usually pet-friendly might make an exception in the case of widespread disaster. We discovered that a few years ago when our home’s flooring was being replaced. The Marriott Courtyard where we were staying suddenly had lots of dogs and cats wandering around (with their owners!), and when I asked about it, a very relieved dog-mom explained the hotel was making an exception due to a major flood a few miles away.
8. Have Your Transportation and Fuel Preps Ready
Hopefully, you’ve been keeping an eye on weather and news reports and have ensured your vehicle’s gas tank is full. In addition to that simple, obvious step, here are a few more.
- Load extra filled gas cans if you have them.
- Check the air pressure of the tires.
- Be sure you have everything necessary for dealing with a flat tire, including a spare.
- Pack extra engine oil and other fluids if your vehicle is likely to need it.
- Have a spare set of wiper blades, or make sure the ones you have on the vehicle are in good condition.
As soon as you’ve made the decision to evacuate, have someone quickly go through the car and remove anything that takes up space and you won’t be using. You’re going to need as much car interior space as possible for this evacuation.
9. Prepare the House
As you drive away from your home, no doubt you’ll have feelings of sadness and, perhaps, loss. A written plan to protect your home will increase the chances of having a home to come home to. Here is a checklist I’ve used.
- Turn off gas and water.
- Go out to your electrical panel and switch off everything except for the breakers marked for the kitchen.
- In the winter, take steps to avoid frozen pipes.
- Unplug everything in the house except the refrigerator, freezer and a lamp. Even if our entire neighborhood is evacuated, I would just rather my home look occupied.
- Shut down and unplug the computers if you aren’t taking them with you.
- Close and lock all windows. Close blinds and curtains.
- If your emergency requires it, board up the windows or put up your storm shutters.
- Depending on the current weather, turn off air conditioner and/or heat or set them at minimal levels. (Make sure to leave those breakers in the ‘on’ position on your electrical panel.)
- Set your home alarm to Armed.
10. Practice and Review Each Year
You might not live in hurricane country, but June 1, is the official start of hurricane season, and it’s also a good date for your emergency evacuation dry run as well as a review of your plans. It’s the start of storm season with tornadoes, derechos, overloading of the power grid, and heat waves that all come with their own threats. It also gives you a few months before severe winter sets in if you live in cold country.
Before the practice evacuation, survey each room. What, if anything, should be included in an emergency evacuation? Family photos? A wedding album? The kids’ schoolbooks? If you determine ahead of time that nothing in a certain room is worth packing, you won’t waste valuable time searching through drawers or shelves and trying to make on-the-spot decisions under duress
For the dry run, don’t worry about grabbing those things this time around, but do add them to a Last Minute Packing List, and then keep that list in your Grab-and-Go Binder, bug out bag, or anywhere you’ll remember it. This will include things like prescription medications, medical equipment like a CPAP machine, firearms, and cash.
Once you start that dry run, time how long it takes everyone to grab bags and get in the car. Update the plan after any family changes (new pet, new medication, kids’ ages).
Here’s a suggested step-by-step plan for your practice evacuation
- Get pets out of the way first. The designated person rounds up theh animals, gets them inside their carriers, and transports them to the car. If the weather is very hot or very cold, start the engine and get the AC or heat going.
- Create a “staging area” where all supplies to be loaded up will be assembled:
- Each person’s bug out bag
- The family bug out bag
- Pillows, blankets, sleeping bags
- Ice chest with water bottles and food that needs to be kept cold. Remember that you’ll have access to grocery stores, convenience stores, fast food places, and restaurants along the way, but a stash of ready-to-eat handy foods will help your family make quick progress along your evacuation route without stopping.
- The family strong-box or portable safe, if that’s where you keep cash, valuables, and important documents
- Laptop computers with chargers
- A power bank or power station with chargers
- A case of water bottles — so helpful in all kinds of ways
Last Minute Additions
- A set of spare house and car keys. If you have to leave in a hurry, you want to make sure you have a way to get back in your house and get on the road.
- An emergency toilet: a handy-dandy five-gallon bucket with plastic liners. This bucket can also hold random emergency supplies until it’s needed as a toilet. Filling the bucket with toilet paper, wet wipes, Clorox wipes, and a bottle of bleach/water mixture is even better.
- Pack any hand tools you might need. A claw hammer or a Phillips screwdriver might make all the difference in the world in a survival scenario.
- Family heirlooms and valuables, including photos, should be packed up quickly. Now, before a crisis hits, would be a good time to transfer irreplaceable photos and documents to CDs and/or zip drives. It’s much easier to grab a few CDs than armfuls of photo albums or, if you’re like me, boxes of loose photos.

Finally, Review The Evacuation Dry Run
Here’s where you’ll know whether or not your emergency evacuation plan has any holes or is ready for a worst-case scenario.
- What was your actual time, or did you have to call it quits after two hours?
- Who remembered their assigned tasks? Who forgot?
- If your thirty-minute goal wasn’t met, what can be done to speed up the process?
- Was there anything of importance you forgot to include?
Frequently Asked Questions
GET OUT! In a dangerous and imminent emergency, your life and the lives of your loved ones come first. Just get out! In the aftermath, there will almost certainly be help and support from friends, family, churches, aid organizations, and similar organizations who will provide you with food and clothing and help you get back on your feet. Other than that, have those emergency kits packed and ready to grab on your way out.
Yes! You have many more alternatives than you might think. I’ve made a list of them in this article, and it includes options like state parks and campgrounds (be sure to have camping gear with you), youth hostels, and even timeshare resorts if you own a timeshare. Here’s the link to the complete list, which is also in my book, Emergency Evacuations.
In Summary, The More Options The Better
When your vehicle is fully ready with extra fuel and equipped for vehicle-related emergencies and you’ve followed these instructions, you now have lots of options. You can travel more quickly and further ahead because you won’t need to constantly stop for food, water, a hotel, or to fill up the tank. While everyone else is queuing up for gas and food and fighting over hotel rooms, you’ll be sailing right on by!
Being prepped for an emergency evacuation gives you more options. You can stop to get a meal, or not. You have food in the car and maybe even a hot meal in your HotLogic cooker! If you have to make a bathroom stop, you can do that by pulling over to the side of the road, using the portable toilet, and quickly moving on. The key is to pack up quickly, do it in an orderly fashion, and then get on the road.
An evacuation is an extremely tense and fearful experience. Just ask anyone who has had to run for their lives from an oncoming flood or firestorm. Preparedness helps take some of the panic out of the process, and when the whole family is informed and is involved with the planning, you can count on getting out quickly and efficiently.
When everyone has designated jobs and knows exactly what to do, your family can be packed and out of town before most other families grab their toothbrushes. Your family needs to organize an emergency evacuation plan to make this happen and avoid hysteria, chaos, and needless tears. Bugging out can be better streamlined and less traumatic than you might think.
When floodwaters are rising or a wildfire is headed your way, there’s no time to figure out who’s doing what. This one-page worksheet assigns every evacuation task to a specific person — so your family moves like a team, not a panicked crowd.
- Covers animals, food & water, documents, vehicle prep & securing your home
- Built-in “Assigned To” column so everyone knows their role
- Room to add tasks specific to your family
- Designed to print and post — not scroll and forget
I'm trying to organize our stuff to help make it easier to grab and go, if needed. We don't have an organized plan like yours yet, but one thing I think is good to have is a shoe box size plastic box for the front seat of the car. We have maps of our state and the ones near us that we could easily need to head into, small flashlight or headlamp, chemical stick, paracord, EMT shears (they can cut safety belts if there's an accident), and other small items that we don't normally carry in the car, but could need close at hand in a bug-out situation. We also bought topographic maps of our state and those same adjoining states. The ability to see which roads do NOT involve going over big hills (or rivers) could be important. And in the meantime, the kids can learn a new skill in reading those.
As part of staging things, our first aid supplies are now in the laundry room. Odd place? Yes, but more practical than the bathroom. Other than slip and fall, where are most of your families accidents? The bathroom? The kitchen? the yard (especially kids)? the garage? The laundry room is convenient to all three of the latter, and we don't have to track dirt through the house to get hydrogen peroxide and bandaids on the kids latest boo boos. Plus, in the event of a bug-out, it's quick and easy to get out.
Thats a great idea, thanks!
I've seen a few local companies that sell used laptops for under $200, some for under $100. For basic information storage and retrieval, they are hard to beat. At those prices, someone could purchase two of them, and have the second on hand for spare parts.
Data storage should be on the hard drive, a USB thumb drive and where practical, hard copy.
One reason to have a spare laptop is to use it for electronic storage only, and then keep the laptop itself stored in the type of container that would be safe from an EMP. It may sound a little out there, but stored information would be invaluable — both personal data as well as information pertaining to survival. I need to do a little more research, but one container that sounded simple enough is a galvanized trash can, taped shut. I was thinking of updating our information each month via a flash drive and then re-sealing the can. You have a great website, by the way! I'm going to spend some time reading your info tonight.
We've been trying to figure out how to store things in case of an EMP. What have you found?
I've been printing everything out. There's no telling whether you've properly protected your data electronically and power is not likely to be available in an emergency. True, paper's bulky, but I'm planning on bugging in as possible and only grabbing the necessities for bug out.
Thanks! (I just saw your reply…. ) The site is coming along bit by bit, or is that "byte by byte"??
It's not out there to protect your information from EMP – to a preparedness minded individual. To protect the laptop, find a metal container with a lid. Some ammo cans will do the job, and have room for a few other items. Things to remember are:
1) The device can NOT touch the can. Wrap it in clean rags. You might even set the ragged-device in a loose plastic bag, open top. The reasons are that you don't want conduction via met-to-metal, and you don't want condensation to collect inside a plastic bag.
2) Use a desiccant in the container, unless you are going into it frequently (which allows for drying out.) Temperature changes will cause some sweating inside the can, hence the desiccant. KEEP IT DRY.
3) SEAL the container. Ammo cans have rubber gaskets. Use a metal gasket as an addition, in the joint, and make sure it is "crushed" when the lid closes. Aluminum foil in a roll will work, and so will the static dispersing seals on some computer equipment. I prefer the foil. Remove the paint on the can's contact surfaces to make a metal-metal union.
4) If you want to use another container, make sure it can be sealed.
Gaps in a sealed can act as a "slot antenna". The smaller and fewer in number the slots, the less chance of something from within the broad spectrum of wave lengths from an EMP device getting inside the container. The little gremlins come in all sizes, and the look for a hole that fits them. In the moment that the energy passes through your location, the charge builds up on the surface of metal objects. Openings allow the charge to run around the inside of the container and hit the metal items within. This is why we try to seal cans…. to allow the charge to run the outer surface and dissipate.
The enemies of a Faraday Cage are gaps, metal contact with the contents and moisture.
A variation on the laptop update is to burn your documents onto CDs, which will last many years. Update them, and not the hard drive. Keep two sets in different locations in your home. Only open up the laptop every 3 months to charge (oh, yes, keep the battery OUT of the laptop, and refer to your docs to see if storage is done full or empty for your particular machine….), and to test /update. Then pack it up again.
Best Buy has "netbooks" for $250 that blow away anything we could get just a few years ago. At that rate, consider getting 2 of them for redundancy and parts.
I found a flashdrive that helped me put my life in order without much effort. But what is really unique is the Emergency Preparedness Page that has a check list of everything needed in case of emergency and a page with website links to Fema and other important sites. Very cool. I wish I had this last year when I had 10 minutes to evacuate my home from a wildfire. Eight of those minutes you stand stunned wondering what to take first. Now I have everything important to me, my family, my pets information with me at all times. And it's not expensive. It's called Life Link Safe.
This is a great article and I am printing it to remind myself of more things I have yet to do, like store the rest of our photos in CDs. I got about half way through. Thanks for keeping us on track 🙂
One important thing to think about with external device storage is – how much banging around can the device take? Many external hard drives are relatively fragile, since they have a spinning disk inside. Plus, sometimes the cheaper ones just fail for no discernable reason. I'd highly recommend anyone going the external storage route buy at least two externals, or better yet, buy solid state drives. They're more expensive, but MUCH less likely to die if they're exposed to rough handling. Otherwise USB thumb drives are a great choice, even if you can store less per stick.
Personally I've gone with the USB stick approach, because it allows me to sort each stick by category – eg all photos on one, all emergency info on another, inventory lists on another, etc. This allows me to save time when I need to find things in a hurry – I know exactly which USB stick to grab.
Hi, I was looking for an appropriate place to ask this question for a couple of days and this is as close to it as I can find. The short of it is, I am preparing for an EMP (and then I’ll be prepared for all else as well). I am looking at a 1973 Ford F250 Pickup truck. It’s in excellent condition and everything works. But my question is I have heard that the old cars will work if they do not have the electronic or computer chipped parts in it as they will be unaffected by an EMP. But one mechanic just told me that the carburator and starter will blow out and to keep an extra part in “a lead lined box”. I know he meant a Faraday cage and I will follow the instructions above for one but is that necessary for even the old cars? He said I would need to keep the extra parts and learn how to replace them after an EMP. Won’t this truck be unaffected by an EMP? Thanks.
To me, more emphasis should be placed on #10 “Where would you go?”. I have at least 2 bugout locations within half a tank of fuel. In a loaded down pickup truck, thats 100 miles, or so. One is a small parcel of land (.7 acre) I bought for less than $4k, and is near a small town. I put in a 2 in well, with a hand pump. I also had a power pole installed with a campground style rv hookups. 30amp and 2 115 amp hookups. That was about $2k more. This year I will build a shed there to house more emergency supplies. I camp there 4 times a year, just to keep the place maintained. The second place is a small motel that is American owned, and same owners for 15 years. I have developed a good rapport with them over the last 2 years, and in case there are no rooms available, they will let me camp with my small enclosed trailer. But overall, this was an excellent list!!
That’s a great plan. My concern is for people who can’t have that type of situation or don’t want it. For those people and maybe even for someone like you, check out my article about bug out options, https://thesurvivalmom.com/11-last-minute-last-ditch-evacuation-locations/
I am an electrical engineer & have been required to design EMP & SCIF shielding for various – ahem – high security national facilities over the years. Many of these were designed to have to be able to survive a nuclear event.
A couple comments on EMP shielding: something is better than nothing. However, a strong EMP ‘leaks’ through non-electrically conductive joints. I see a note about an ammo container with a gasket is mentioned. Unfortunately, this is not a robust EMP shield, since RF (Radio Frequencies) can ‘leak’ through a rubber gasket. The metal trash can is better, but the small air gap around the lid is not as impregnable as you might think.
Heavy foil, wrapped and overlapped around a device would be pretty good, as would a can which has a tightly fitting metal lid.
The business about putting something in a plastic container or otherwise insulating it from the walls is not something I’m familiar with…….wouldn’t hurt, but but I don’t see the significant benefit (except that it keeps batteries from shorting & discharging).
The best EMP protection is a metal (steel, copper or aluminum) box, with a tight fitting electrically conductive joint. The problem with aluminum is that the joint forms an insulating layer when exposed to oxygen, so this needs special attention. As an example example, we used to weld galvanized steel conduit at the threaded joints to truly shield high magnitude EMP (this is beyond what most people would have to deal with, I believe).
Hi Lisa,
I just linked up with your site a week ago. It is a TREASURE TROVE of information!! In this post, the link to the Vehicle 72 Hour Kit is not working … I get a “page not found” message. Can I get to this post some other way?
Thank you so much!
Carla
The link is fixed now, Carla. Thanks for the heads up! For your convenience, I’ll add it here, also. https://thesurvivalmom.com/dont-leave-home-without-it-the-vehicle-72-hour-kit/
Thirty years ago my brother created a “Get out of Dodge” list that we have added to and improved over the years. A copy stays in a page protector posted inside a closet door and items are sorted so that one can quickly access a group of items from an area making it time efficient. We have a backpack loaded with essentials ready to go. I just purchased a medium level solar generator that will help with TV-Internet-refrig-freezer during power outages but is portable enough to take in the car. Got to make an EMP container for it and some other electronics. This is an ever evolving project. Thanks for all your info. I bought each grandkid solar phone battery storage (4Patriots) for Christmas.