
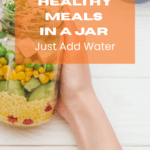


Meals in a jar have saved me more than once when dinner needs to happen fast but I had nothing planned. These jar meals have ingredients already measured and ready to go. This is a complete guide to assembling just-add-water meals using freeze-dried and dehydrated pantry ingredients, including a tested Saucy Baked Ziti recipe, what ingredients work and which ones don’t, how to seal them for long-term storage, and why this is one of the smartest ways to use the freeze-dried food sitting in your pantry instead of just hoarding it.
Some days you need dinner to be quick, easy, and require almost no thinking. That’s where freeze dried meals in a jar come in. When the dry ingredients are already measured and layered together, all you have to do is dump the contents into a pot, add water, and cook. It’s one of the simplest ways I know to turn pantry ingredients into a fast, homemade meal.

What Is A Meal In A Jar?
A meal in a jar is a complete recipe stored in a wide-mouth quart jar with all ingredients shelf-stable and measured out. It’s ready to cook whenever you need it. To make one:
- Choose a recipe with ingredients that cook at roughly the same rate
- Layer the dry ingredients into a wide-mouth quart jar, shaking down between additions
- Add an oxygen absorber and seal the lid
- Store in a cool, dark, dry spot
- When you’re ready to eat, empty the jar into a pot, add water, and cook
No prep work or measuring, no chopping, no thinking required when it’s dinnertime. Just dump everything into a pot, add water, and cook.
Some of the links in this post may contain affiliate links for your convenience. As an Amazon Associate, I may earn a small commission from qualifying purchases without any increase in price to you.
In This Article
- What Is A Meal In A Jar?
- What Is A Meal In A Jar?
- Step-by-Step How To Assemble Meals In A Jar
- How long do meals in a jar last?
- Tips for Assembling Meals-in-a-Jar
- Recipe: Saucy Baked Ziti with Sausage and Mushrooms
- Recipe: Marinara Sauce
- Best Ingredients for Freeze Dried Meals in a Jar
- Benefits of Meals in a Jar
- FAQ
- More Ways to Use Freeze-Dried Foods
- Get My Free Freeze-Dried Primer Printable — Loaded with info and tips on just one page
- Final Thoughts
I’ve talked about getting started with food storage and also how super simple it is to stock up on three months of food storage fast, but the thing….most of that still needs to be prepped, especially if you cook from scratch. That’s why I’m excited about meals in a jar recipes for long term storage AND for saving me from swinging by a fast food restaurant because I’m crunched for time and everyone has got their “hangry” on. Prices are so sky-high but a handy meal that only needs water and heating up on the stove makes more sense than ever.
What Is A Meal In A Jar?
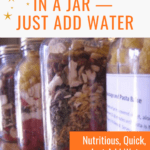
A meal in a jar is a complete meal of dry ingredients made by layering them in a mason jar so they’re ready to cook whenever you need them. The ingredients might include pasta, rice, dried vegetables, seasonings, beans, or freeze-dried meats. Everything is measured ahead of time and stored in a jar, so when it’s time to make dinner, you simply empty the jar into a pot, add water or broth, and cook.
Think of it as a homemade version of a convenience meal, but without the preservatives, mystery ingredients, excessive sodium, or high price tag. Because the ingredients are already combined, freeze dried meals in a jar save time on busy nights and make it easier to turn basic pantry foods into a familiar hot meal the family loves.
They’re also useful for stocking a pantry with quick, ready-to-cook meals. They’re easy to assemble, which makes it easy to always have a few jars on hand for those times when cooking from scratch feels like too much work, or for times when grocery shopping hasn’t happened yet and dinner needs to come from whatever you have on hand.
Most meals in a jar are stored in quart-size mason jars, which typically hold about 3–4 servings depending on the recipe. The key is to choose ingredients that store well and cook at roughly the same rate so everything comes together easily in one pot.
One of my first meals in a jar included dry beans, which took forever to cook through, and by the time they were soft, the pasta in the recipe had turned into mush. So, yes, there’s a bit of a learning curve involved to make sure your meals cook up correctly every time.
Step-by-Step How To Assemble Meals In A Jar
Time needed: 2 hours.
Assemble your meals in a jar by layering dehydrated or freeze-dried ingredients, shaking the jar to help them settle, and topping it with an oxygen absorber to create a long-lasting, shelf-stable meal.
(Time needed is an estimate. How long it will take you to assemble will vary based on your recipe and the number of jars you’re making.)
- Gather supplies
You’ll need 300 cc oxygen absorbers, wide-mouth quart* jars, lids, rings, a wide-mouth funnel, and a way to sterilize your jars (do this far enough in advance to make sure they are good and dry.) You also need labels with the cooking instructions and a place to mark the date that the meal was packaged. If you prefer to use mylar bags or a vacuum sealer to seal the jars, then gather that equipment also.
A quart jar will only hold 4 cups of food so all of the dry ingredients for your recipe will have to meet that limit. Use mylar bags or vacuum sealed bags for larger quantities.
- Choose a recipe
There are many meals in a jar recipes available online or in cookbooks. You can also modify existing recipes to fit your preferences and available ingredients. I’ve included a recipe for Saucy Baked Ziti with Sausage and Mushrooms in this article.
- Prepare your ingredients
Ensure you have enough of each ingredient for the number of jars you plan to make. Gather them in one location laid out assembly line style. It’s up to you whether you move through the ingredients and fill a jar at a time, or add one ingredient to all the jars and repeat with the next ingredient. Choose the method that works best for you.
- Assemble the meals
Using a wide-mouth funnel, measure an ingredient into a jar and shake it down to help it settle. (If you’ve not worked with canning jars, I’ll just mention that it’s tempting to bang the jar on the counter, but it’s bad for the jar and can weaken the bottom of it. So, bang it on the palm of your other hand or on a towel-covered counter.)
Once those ingredients have settled, throw in more ingredients, and shake it down again. Throw in still MORE ingredients…. Shake your head and mumble about how, “That’s never gonna fit.” Shake down the ingredients and be pleasantly surprised that they all really DO fit after all!
- Prepare to seal the jars
Place your lids in a warm place, like on a cookie sheet on the wood stove or in a warm oven. This softens the gasket a bit so it’s easier to screw the ring down and get a good seal.
Make sure the rim of the jar is completely clear of any food particles and wipe it with a clean cloth, if necessary. Debris on the rim will interfere with creating an air-tight seal.
- Seal the jars
Place the oxygen absorber in the top of each jar, being careful that the corners would not interfere with the lid coming in contact with the rim of the jar. (Another reason for wide-mouth jars!) Position the lid and tighten down the ring. When you hear the satisfying ‘plink’ as a vacuum formed inside the jars. It’s really that easy! Store in a cool, dark, dry location.
How long do meals in a jar last?
Shelf life depends on the shortest-lived ingredient in the jar, not the longest.
Shelf Life by Ingredient
| Ingredient | Typical Shelf Life |
|---|---|
| Pasta | 7-8 years |
| Rice | 8-10 years |
| Freeze-dried meats | 15-25 years |
| Freeze-dried vegetables | 15-25 years |
| Dehydrated vegetables | 5-10 years |
| Dried herbs and spices | 2-4 years for full potency (safe to eat longer, just weaker flavor) |
| Bouillon and tomato powder | 1-2 years unless kept airtight |
So a jar with pasta and freeze-dried meat is realistically good for 7-8 years, since the pasta is the limiting factor even though the meat inside would last decades longer on its own. If you want a longer-lasting jar, swap pasta for rice, which buys you another year or two.
How to Size Your Oxygen Absorbers
Oxygen absorber size is based on jar volume, not the type of food inside:
- Pint jar: 100-200cc
- Quart jar: 300cc (the standard for meals in a jar)
- Half-gallon jar: 500cc
Bigger isn’t better here, by the way. An absorber sized too large for the jar won’t cause a problem, but one sized too small won’t fully remove the oxygen, which defeats the purpose. You’ll know it worked when you hear that “plink” as the lid seals down, and even if you don’t, if you know you’ve selected the appropriate size absorber for the jar, you’re good to go.
One practical note: opened oxygen absorber packets start losing effectiveness within about 20-30 minutes of air exposure. If you’re assembling a big batch of jars, get your work station set up with jars, ingredients, lids, and absorbers so you can work quickly.
Reseal any unused absorbers in an airtight container right away. I usually pack them into a smaller canning jar.
Tips for Assembling Meals-in-a-Jar
- Test first: Before making a large batch of a meal, prepare just one first, and adjust ingredients, if needed. If you use recipes specific to meals in a jar, this has already been done for you. This one by Chef Tess is reliable as she has worked with freeze-dried food and recipes for decades.
- Start small: Consider working with 8-10 jars at a time to get comfortable with the process.
- Warm your lids: Warming the lids with dry heat softens the gasket, making it easier to create a secure seal. I had the best success rate of jars sealing when I warmed the lids with a dry heat, a few minutes in the oven at a low temperature, so the gasket was softer.
- Alternate sealing method: A vacuum sealer may also be used to seal the jar. This method requires an attachment, which are typically sold separately from the vacuum sealers. Mylar bags with oxygen absorbers another option, making them “meals-in-mylar”!
- Use wide-mouth jars: Wide-mouth jars work the best as they are easier to fill and allow for better ingredient mixing. Standard will work, too, but I REALLY have to work to get the ingredients shaken down enough to seal. Just buy wide-mouth jars for a more stress-free project.
- Work in a dry environment: Humidity can affect the success of sealing your jars. Consider assembling your meals in a dry location with low humidity. I live in an area where it can be very humid in the summertime. Planning to assemble these meals in the winter (with a woodstove going) is a better environment for working with my freeze-dried foods.
- Make tonight’s dinner, too! Measure a set of ingredients into your skillet too…might as well be fixing tonight’s dinner while you’re putting in my kitchen time!
- Add small ingredients last: Save spices, seasonings, herbs, and powders to the last. They’ll filter and settle through the larger food pieces.
- aka Just-Add-Water: You may occasionally hear meals in a jar referred to as just-add-water meals.
Recipe: Saucy Baked Ziti with Sausage and Mushrooms
I modified one of Chef Tess’s recipes based on what I had in my pantry, In some cases, the freeze-dried and dehydrated foods I had on hand required me to experiment, so I cooked one or two of the recipes with what I already had and made adjustments accordingly. I made sure to jot this new version of the recipe down so I could duplicate it multiplied by 20!
Ingredients
- 2/3 cup tomato powder
- 1/2 cup freeze-dried onion
- 2 tbsp freeze-dried spinach
- 1 tsp oregano
- 1 tsp basil
- ¼ tsp marjoram
- Dash of thyme
- 2 tbsp cheese blend (Alternatively, you could use freeze-dried cheese.)
- 1 tsp sugar
- 1 cup freeze-dried sausage crumbles
- 1 cup (3 oz) ziti or other pasta
- 1/3 cup freeze dried mushrooms
- 2 tbsp carrot dices
To Assemble
Add all ingredients to a quart jar. If there is extra space, I pack more pasta in there, piece by piece.
To Cook
Place contents of jar in a covered skillet, along with 4-3/4 cups water. Simmer 15-20 minutes until pasta is tender and sauce is thickened. Serves 4.
Recipe: Marinara Sauce
One dehydrated recipe to master is marinara sauce. It’s super simple and can be used in many recipes, but my recipe is an old school, cook from scratch type of recipe. Here it is:
Combine tomato powder with garlic, herbs, and salt. Taste test small amounts with a bit of water until you have a combination you love, then record your “recipe.” Store the mix in jars or mylar bags or use it in recipes that call for prepared marinara sauce.
See how simple that is? Buy commercially packaged tomato powder or make your own by processing dehydrated tomato slices in a blender until completely powdered. Learn more ways to use tomato powder here.
How to Cook Meals in a Jar Without Power
This is actually where these meals are at their best. The power’s out, everyone’s hungry, and there’s no way you have the energy or mental focus to start preparing a meal. Plus, you want to keep the fridge and freezer closed for as many hours as possible! Here are some options:
- Camp stove or butane burner: Works exactly like your stovetop, and you’ll use the same water ratio and the same cook time. This is the simplest backup if you already own one.
- Rocket stove or wood fire: This takes more attention to keep the heat steady, but a small metal pot with your jar meal plus water will cook the same way it would indoors. Just watch it more closely since the heat isn’t as consistent.
- Thermos cooking (no direct heat at all): Boil water using whatever heat source you have. Check out my system for combining a power station with an electric kettle. You don’t need a lot of water, even a small amount from a portable stove. Then pour it over the jar contents in a wide-mouth thermos, seal, and let it sit for 1-2 hours. This works well for pasta and rice-based jars especially, since the trapped heat keeps cooking the food the whole time it sits.
- Solar oven: Slower, but works very well for these recipes on a sunny day. Expect roughly double the normal cook time, though.
Whichever off-grid cooking method you use, the water ratio stays the same as the stovetop instructions. What changes is how you deliver the heat and, likely, the cooking time.
Best Ingredients for Freeze Dried Meals in a Jar
When I made my first meal in a jar, the recipe called for a large amount of beef bouillon. I had only ever used boullion cubes! So, I bought a small jar of granulated boullion, not knowing I could buy it in much larger quantities.
Since so many recipes for meals in a jar call for bouillon, start by buying a larger container of your choice of flavors. I’ve purchased Shirley J bouillon and can recommend the brand for its flavor.
Tomato powder will also come in handy for recipes with a tomato sauce base, such as the marinara recipe in this article. Best to buy it in bulk since you may be using two to three cups at a time.
TIP: For both bouillon and tomato powder, be sure to keep them stored in airtight containers as both can harden with any humidity. Canning jars are best for this purpose.
Small pasta, such as macaroni, rotini, and farfalle, are all great candidates for meals in a jar because they will cook through quickly and have a long shelf life.
Most-used ingredients in your kitchen. As you prepare for your assembly-line production, think about ingredients you use most often, such as onion, celery, and ground beef. They will likely become part of your meals in a jar, so look for dehydrated or freeze-dried versions.
Spices and seasonings you use most often. Whatever you use most, you’ll need for your meals — onion powder, chili powder, dried basil, black pepper, and so on. If you’re planning a major meals in a jar project, stock up on large sized versions of these found at Costco, Sam’s Club, and on Amazon.
My recommendation is to choose 3 or 4 different recipes for your jar meals, make a shopping list of all the ingredients, and then begin buying them in bulk, making sure you have enough of each ingredient. Avoid recipes that call for a single ingredient you know you’ll never use again, such as freeze-dried kale (unless you typically use kale).
Benefits of Meals in a Jar
- Inventory your food storage in a new way: Meals in a jar encourage you to explore your food storage from a different perspective, helping you identify what you have and what you might need.
- Rotate your food storage: By using up older ingredients in meals in a jar, you can ensure your food storage stays fresh.
- Actually use your freeze-dried food! A lot of us have stocked up on a lot of freeze-dried food over the years, stored it in cupboards and closets, and there it sits. Meals in a jar gives you a chance to put that food to good use, both for meals now and stored, complete meals set aside for emergencies.
- Learn how much food your family needs: Making meals in a jar allows you to see how much food your family consumes of specific items. You gain a better idea of how much you actually need to store of specific food items that you know your family likes.
- Experiment with your food storage: Meals in a jar provide a safe way to experiment with different food combinations without (entirely) compromising the shelf life of your ingredients.
- Create healthy, delicious meals quickly: With meals in a jar, you can have nutritious and tasty meals ready in under 30 minutes, perfect for busy weeknights.
- Extend the shelf life of some pantry staples: Meals in a jar can help extend the shelf life of spices, pasta, and other store-packaged items, which would need to be repackaged for long-term storage anyway.
- Save time in the kitchen: By having pre-measured ingredients ready to go, meals in a jar can significantly reduce your cooking time. These one-skillet meals can be ready in less than 30 minutes, allowing you to spend less time in the kitchen and have more time for things you’d rather do.
- Share them with others: It’s better to give than receive. Having multiples allows you to share them with others in need.
FAQ
The shelf life of your meals in a jar depends on the ingredient with the shortest expiration date. For instance, if your recipe includes pasta (which typically lasts 7-8 years), that will be the overall shelf life of your jar, not the longest-lasting ingredient.
Shelf-stable ingredients include dehydrated and freeze-dried foods, dried spices and herbs, pasta, rice, and other grains. Always use freeze-dried meats.
No, jars aren’t your only option! Mylar bags with oxygen absorbers or vacuum-sealed bags are ideal for long-term storage, while Ziplocs work well for short trips. Jars offer visibility but are heavier, so choose based on storage duration and your priorities for weight and space. Bonus: You can ditch the 4-cup limit with mylar or vacuum bags!
The type of meat to use in these jars is freeze-dried, and yes, you can use every type of freeze-dried meat available — ground beef, beef dices, chicken dices, turkey, sausage crumbles. They all work, but check the labels as some brands and meats may have a shorter shelf-life once the original container is open.
Dried beans and whole grains, such as wheat berries, since they need a much longer cooking time than all the other recipe ingredients. All other ingredients must be completely dry and shelf-stable. Anything containing fat or any moisture will spoil and create mold inside the jar. As well, don’t use any fresh ingredients, including fresh herbs or fresh garlic. Bacon bits and nuts contain oils, which can also be problematic
If the ingredient is completely dry, shelf-stable, and cooks at roughly the same speed as the other ingredients, it’s probably a good candidate.
In case you aren’t sure of ingredients for one of your own recipes, rely on those from someone who has created and tested recipes specifically for meals in a jar.
Yes, and my preferred way for long-term storage is using a jar sealer attachment with my Food Saver, but what’s even easier to use is an electric jar sealer. They both remove the oxygen, and I don’t have to worry about my oxygen absorbers absorbing too much oxygen before I can put them in a jar and seal it.
No, not for these jar meals. Fresh ingredients, including fresh herbs and fresh garlic, contain moisture that will cause mold inside a sealed jar, even with an oxygen absorber. Oxygen absorbers remove oxygen, not water, so they can’t stop moisture from causing spoilage. Everything going into a shelf-stable jar needs to be fully dry: freeze-dried, dehydrated, or a naturally dry pantry staple like pasta, rice, or bouillon. If you want to build a meal with fresh ingredients, that’s a fridge or freezer meal, not a shelf-stable one.
One exception: You can add fresh ingredients to the jar meal once it’s cooking. So if you have fresh chicken or want to add fresh basil to your meal, that’s when you can do it safely.
Not quite. “Dry canning” usually refers to baking jars of dry food in a low oven to create a seal, and it’s a method the USDA, the National Center for Home Food Preservation, and most university extension offices actually advise against. Ovens weren’t built for that kind of dry heat on glass, and there’s a documented risk of jars cracking or shattering. Moreso, there’s no reliable way to confirm the food inside reached a safe temperature.
The method in this post is different. You’re sealing with an oxygen absorber at room temperature, no oven involved. That’s the approach extension services do recommend for dry goods.
More Ways to Use Freeze-Dried Foods
- 21 Tips for Getting Started with Meals in a Jar
- 8 Tips for Placing Your First Freeze-Dried Food Order
- 15 Creative Ways to Add Freeze-dried Sausage Crumbles to Your Food Storage Pantry
- Just-Add-Hot-Water Meals: How to Decide Which Brands and Varieties are Right for Your Family
Get My Free Freeze-Dried Primer Printable — Loaded with info and tips on just one page
Final Thoughts
Meals in a jar are a terrific way to not only rotate some of my food storage, but open it up and see exactly what’s inside! Taste it and make sure my family likes it, and then have fun repackaging it into ready-made meals that will be quick and easy to fix in a pinch–busy weeks or unexpected weather events! It’s a delicious and practical solution for families who prioritize preparedness, healthy eating, and saving time in the kitchen. With a little planning and effort, you can stock your pantry with a variety of nutritious, shelf-stable meals that your whole family will love.
Why not use the Food saver jar sealer and forgo the o2 absorbers? There are even instructions on the internet on how to use a hand operated vacuum pump (sold where you can purchase tools, like harbor Freight) with the jar sealer attachment. Got one! LOVE IT! I store tons of things in my jars with the air removed. Cereal, pretzels, rice, oatmeal, cornmeal, brown sugar, walnuts, and the list goes on and on! =)
Do you need a special lid for the mason jarsd when using this foodsaver tool?
No you don’t. Just put the lid on, there is a special fitting for the Foodsaver that fits over either size lid and run the Foodsaver to suck all the air out! I’ve done this quite a bit and so far so good. I have found that I can even reuse the lids for the most part.
Glad you addressed using the food saver adapters. I have been dry canning with them with the hand held food saver. Works great. When I open a #10 can or even a store. Ought bag of something I repackage the part I don’t use in jars in this manner then just pop off the lid when I need more of that item. I resell the jar with the hand held vac and adapter and put it back in the pantry. Can’t wait to get started making my meals in jars!
Great info! Thank you for sharing all of this!
Ooops I meant to also say I totally get you on the whole jars thing being pretty and loving to look at them LOL!
Do the ingredients have to be freeze dried? If I already have onion powder and dried mushrooms couldn’t I just use those?
The foods do not necessarily need to be freeze dried. Anything dehydrated will do, and yes, you can use your own spices…I have a wonderful book written by Kathy Clark that I purchased off of Amazon called “Dinner is in the Jar” and along with recipes, there are labels with ingredients and instructions that you can photocopy. Great book!
I have a question . The meat and vegs used in any dinner in a jar must be freeze dried to last for the time 4-5 yrs as your article mentioned. I did not think dehydrating meats would last ,too greasy. Please explain .
k
Can’t wait to try this! I’m imagining “Casserole in a jar” to fulfill this week’s action step!
I love this idea! On top of everything else that might go on in an emergency, I don’t want to have to think of what to make with my stored food. Chef Tess has so many wonderful meal in a jar recipes.
There are a lot more recipes, tips and ideas on how to use and implement the meals in a jar on my blog as well as printable recipe sheets. I’m happy to help in any way I can with these meals and am currently writing a comprehensive cookbook on using and making them. I usually update with a new recipe once a week or more. Thank you for posting this Survival mom! Xoxo! I love your work my dear!
You are so awesome! I’ve been looking for recipes like this for a couple weeks and just haven’t had much luck. I’ve been dehydrating everything I can get my hands on and wanted to start putting together meals with some of it but needed some guidance 🙂 Thank you!
Just stumbled across your site and I LOVE this idea!!! Thanks for sharing!
Like Rachel, I am dehydrating a lot of my own surplus. I notice that you have used freeze dried ingredients from cans that you bought. Would it be the same if I used my own dehydrated herbs and spices and other items like spinach and collard greens that I have dried, put into my blender and made into a powder? Is home dehydrated food as safe to use as the freeze dried items you bought? I don’t want to store something that will not be healthy or that will go rancid and ruin the contents of the jar.
This idea is genius! I’m planning to put together meals like this, but, instead of jars, packing them in mylar bags. Don’t have to worry about breaking a jar and much lighter and compact if having to grab and go.
Thanks so much! LOVE the website!!!
Hi,
For single adults who don’t need as large a recipe as Chef Tess makes (I am hoping to reduce some of hers since they sound so good) you can use trail cooking recipes from here: http://www.trailcooking.com/ they are already one serving. Could probably store multiples in a mylar bag or jar with oxygen absorber.
If you are a single adult and need smaller size recipes than Chef Tess (though I love the sound of her recipes and intend to try and cut them down to fit my single person household) there is a website that gives single serve recipes to pack in baggies: http://www.trailcooking.com/ Maybe place them in a wide mouth jar w/an oxygen absorber. This is my August/Sept goals (in the a/c room since this part of Tx is humid)
The jar meals can they all be stored in the Mylar bags ?
If you don’t know, you can get a Food Saver jar sealer for both narrow and wide mouth jars. eliminate the need for oxygen absorbers. Love your idea for softening the seal. I use the rings to help the sela afterwards and have not had a problem with the vacuum failing. You can reuse the lids. Thanks! Great blog.
I’m new to all this, could you please tell me where you buy the cheapest freeze dried goods, and where in the world to I get the #10 cans? Do I seal them at home, or is there a place I can go to? I tried to look these things up on your blog, but can’t seem to find it. I guess i’m too far behind. 😉
There are several sites to go on-line to order freeze dried foods from companies that prepare it for you. They all use the #10 cans as that is standard. I would like to recommend two other sites that have videos to watch the step by step process of using both jars and mylar sealing in food preparation. Each of these two ladies are full of knowledge and we would do good in learning the correct process. Besides, it looks fun! Their sites are:
http://www.dehydrate2store.com/
http://cheftessbakeresse.blogspot.com/
I’m sorry….I forgot to mention where you can buy the dehydrated/freeze dried food from.
http://store.honeyvillegrain.com/
You can also dehydrated your own food from your garden or farmers market for the jars and mylar bags which is what I do. Per the videos!
I like Honeyville foods but beware of their low shipping charges. They MORE than make up for it in the price of their foods, which are more than twice the price when you shop at Honeyville stores.
I know that most people are not as into organic as I am, but rather choose inexpensive, but I have not been able to find a source for ORGANIC long term ingredients for my preps. I did find a source for pre-packaged meals, from MaryJanes Farm, but I would like to find something similar to #10 cans that are all organic.
I feel that the QUALITY of the ingredients is something that I’m VERY serious about, and why would I use things like TVP, soy products, MSG, high fructose corn syrup, or ANY food that has been engineered using genetically modified organisms like roundup or other chemicals in their DNA?
I have looked at all the freeze dried companies listed here, and they use all of the above ingredients in their food.
Doing it ALL myself seems to be the only option for me, and that requires much more work! ;-(
I even vacuum seal the open sleeves of crackers in a jar so they won’t go stale. Also if I have too many leftovers , like rice, I dehydrate and seal in a jar and keep adding to it. My rice becomes instant rice once I have enough saved. You can also dehydrate and seal leftovers like chili or spaghetti but the shelf life is shorter. Great for camping and backpacking trips.
Carol, Thrive has some organic foods in #10 cans including amaranth, quinoa and spelt. Some others also, check it out!
this might be of interest to you Carol – it lists the product details that might be helpful for you
http://frei.thrivelife.com/files/materials/thrive/THRIVE-Product-Details.pdf
I have celiac daughters … I’d like to swap rice for pasta in these meals. I’m guessing regular jasmine or basmati rice won’t work … Do I need to substitute minute rice? I do suppose gluten free pasta could work … Texture just isn’t the same. Any thoughts, or advice?
I would like to make meals in a jar using freeze dried ground beef but the MH rep said that once I open the can food should be eaten within one week. If you open the can for meals in a jar, do you know how long the meat will be good once exposed to the air?
Colleen, after opening a 10# can, you should then repackage it in small, individual or family sized mason jars with either an oxy absorber or using the suction kit made specifically for jars. Actually, since most 10# cans are made from a cardboard material, I would do it as soon as you get it.
Just to be safe.
The Baked Ziti recipe sounds very good. I wonder if I can substitute bacon pieces (found at Sams Club, in a bag..I think Hormel brand) for the sausage crumbles. I have the option of using a Foodsaver to seal the ingredients in a Mason jar or freezing. Which would be best?
Those bacon pieces are greasy, right? They contain fat and will go rancid. I would definitely not recommend using them for a meal in a jar. The sausage crumbles are very dry and will be shelf stable for many months, unlike the bacon pieces.
Just FYI: the link to the 20 packs of oxy absorbers is for a 50 count package…..
Hi. I saved this post as it has value. But, I’m diabetic and try to follow the KETO style diet which is based on LOW carbs,(rice and pasta is especially hard on my glucose numbers) NO sugar.
I purchased the meals-in-a jar made easy book by Jodi Weiss-Schroeder, but again, her recipes are not keto friendly. I noted that you wrote the into for it.
Thank you.
I amtrying to adapt your recipes here to KETO, but it isn’t easy!
What I really need to know is the amounts of dry ingredients (for sauces) to use for a 2 person serving, the amounts of pasta/rice, the amounts of meat/protein…Your recipes are nice, but I have a whole lot of recipes of my own, I just don’t know the amounts to use to make a Meal in a Jar for 2 people…..
Thanks for the post!
Could you use a calculator to figure out the amount of each ingredient per serving and then multiply that by 2 for one jar? Or, make the recipe as is, and then divide the ingredients into multiple jars? For example, a recipe has six servings so divide the ingredients into three jars, which would be two servings each.
Love these tips! Starting small is important when you’re at the start!
If you need any mason jars I have been getting some great options from SKS so I wanted to share!