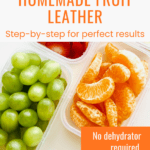


Homemade fruit leather is one of the simplest ways to make a highly nutritious snack and preserve fruit at the same time. It contains real ingredients and none of the corn syrup and artificial colors that show up in store-bought roll-ups. This covers the full process from fruit selection and puree prep through drying, storage, and the common mistakes that lead to sticky or brittle results, plus nine ways to make each batch more nutritious than plain fruit alone.
Finding healthy snacks that you kids will actually eat can feel like a daily battle. This post is your secret weapon. I’ll show you how to turn fresh fruits and berries into delicious, all-natural fruit leather using a dehydrator. Follow these instructions if you’re ready to create nutritious, preservative-free snacks that are perfect for lunchboxes, after-school pick-me-ups, or anytime your crew needs a healthy energy boost.
This article completely updated with new tips for added nutrition and updated methods, April 2026.

Some of the links in this post may contain affiliate links for your convenience. As an Amazon Associate, I may earn a small commission from qualifying purchases without any increase in price to you.
The taste of fresh fruits and berries always has me thinking about things to do with peaches and new ways to use apples. Plus, dehydrating is a great way to preserve summer’s bounty and supplement your food storage, as well as reduce food waste. That’s a lot of wins in my book! Here’s how simple it is to make.
In this article
- What Is Homemade Fruit Leather?
- The Best Fruits For Homemade Fruit Leather
- 9 Ways to Make Your Homemade Fruit Leather More Nutritious
- How Does Dehydration Affect Nutrients in Homemade Fruit Leather?
- Supplies You’ll Need to Make Homemade Fruit Leather
- Basic Homemade Fruit Leather Recipe
- Which Fruits Should Be Simmered Before Making Fruit Leather? (Quick Guide Chart)
- How to Tell When Fruit Leather Is Done
- Common Mistakes to Avoid
- Flavor Ideas and Combinations
- How Much Fruit Should I Use?
- How to Store Homemade Fruit Leather
- Tips for Making Homemade Fruit Leather
- Advantages of Homemade Fruit Leather
- Frequently Asked Questions
- Related Dehydrated Food Content
- Get your FREE Build a Balanced Pantry ebook!
- Final Thoughts
What Is Homemade Fruit Leather?
Homemade fruit leather is a simple, old-fashioned way to preserve fruit by pureeing it, spreading it into a thin layer, and slowly drying it until it becomes soft, flexible, and slightly chewy.
Think of it as a natural version of store-bought fruit roll-ups made with real fruit and little to no added sugar or preservatives.
When it’s completely dried, it can be rolled, cut into strips, and stored for easy snacks. It’s a practical and yummy way to use up ripe or leftover fruit for a lightweight, nutritious, and shelf-stable food that’s perfect for lunchboxes, road trips, and everyday snacking. Plus, it stores really well.
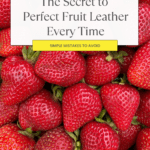
The Best Fruits For Homemade Fruit Leather
The best fruits to use are the ones that are naturally sweet and easy to puree. Soft fruits like apples and strawberries naturally have a higher sugar content and tend to dry well, giving you that smooth, chewy texture you’re looking for.
My Choices For Fruits That Work Especially Well
- Strawberries, blueberries, raspberries: These all have great flavor, and I always combine them with another fruit or two.
- Apples: These give you a great texture and work well on their own or combined with other fruits. My current apple favorite is Cosmic Crisp.
- Peaches and nectarines: You can’t go wrong with either of these and their natural sweetness.
- Mango: On its own or with another fruit, it’s maybe the perfect choice for fruit leather.
- Pears: These have a mild flavor and work well with something tangy.
- Plums: Naturally sweet.
Fruits Best Used In Combinations
A few fruits don’t do well on their own when making fruit leather, and you should plan on combining them with something else.
- Bananas: These are too soft on their own but work really well with several other fruits, like berries.
- Blackberries: The seeds will be too big when the fruit is pureed, but you can strain the seeds out for a better fruit leather.
- Cherries: One of my favorite fruits, but they are stickier and take longer to dry. Try adding a small amount to another fruit or two.
PRO TIP: One way to get excellent results every time is to start with a base of applesauce, homemade or storebought (unsweetened).
9 Ways to Make Your Homemade Fruit Leather More Nutritious
Our family tends to eat lower carb foods and pump up the nutrient value whenever we can. When I set out to revisit the world of fruit leather, I found nine ways to increase their nutrition, so it’s not just a puree of fruit.
I’m including the amounts of each that I’ve used, but experiment a bit on your own to get just the right flavor you want.
- Add pinches of ginger and turmeric. Just 1/8 of a teaspoon of each per batch of puree or to taste.
- Add fruit powder from the bottom of freeze-dried fruit containers, or put some freeze-dried fruit in a blender to make your own powder. Add fresh fruit to the powder, along with any other ingredients. This is a great way to add a fruit that might not be in season.
- Sweeten your puree with a bit of honey. Be sure to use 100% honey that doesn’t include other ingredients, such as high fructose corn syrup. Pure honey will dehydrate while other ingredients may not.
- Add one tablespoon of chia seeds to the pureed fruit. They’ll soften in the puree and be ready for dehydration.
- Add a bit of vegetable puree to the mix. Puree carrots, sweet potatoes, or pumpkin and start with 1/4 cup in your mixture. These pair well with a peach and applesauce slurry. Adjust the proportions of the veggie and fruit to your taste preferences.
- Add a tablespoon or two of unflavored collagen powder.
- Add a small amount, one tablespoon or so, of ground flaxseed.
- Use applesauce as the foundation for its fiber and nutrients in addition to the other fruits and ingredients.
- Two tablespoon of Greek yogurt adds a new element and more protein but will require a longer time of dehydration. If you like the results, add two more tablespoons. This mixture requires a thinner layer of the puree on your dehydrating sheets. Strawberries, peaches, and mango go well with Greek yogurt. Store these fruit leather sheets in the fridge to ensure there are no spoilage issues with the dairy ingredient.
How Does Dehydration Affect Nutrients in Homemade Fruit Leather?
Whether you use all-fruit in your mixture or add other ingredients to increase the nutrients, including fiber, you should know that dehydration only slightly affects those nutrients.
The low heat used in dehydration does cause some nutrient loss, but overall, it preserves far more nutrition than many other cooking methods. You can make, eat, and enjoy your fruit leather without worrying that it’s just another junk food in disguise.
What Nutrients Are Affected?
Vitamin C is the most sensitive to heat and air exposure, so some of it is lost during the drying process. Small amounts of B vitamins may also decrease slightly, especially with longer drying times.
What Nutrients Stay Intact?
Most of the important nutrients remain:
- Fiber stays fully intact, which helps with digestion and satiety. This makes it an especially good treat to stave off hunger.
- Minerals like potassium and magnesium are very stable.
- Natural fruit sugars remain, providing quick energy.
What Actually Improves?
When the water is removed during dehydration, the remaining fruit fiber and nutrients become more concentrated. For some people, it’s easier to eat a serving or two of fruit leather than the raw fruit, so this is a great way to help them get their fresh produce each day.
With your homemade fruit leather, you’re not adding fillers, preservatives, extra sugar, or any other less-than-desirable ingredient.
Supplies You’ll Need to Make Homemade Fruit Leather
Food dehydration is a low-cost hobby, much to my delight. Unlike DIY freeze-drying that can run into the thousands of dollars, you can make your fruit leather with a dehydrator or even in your oven.
Here’s a run-down of the supplies I use:
- A dehydrator. You have a lot of brands and styles to choose from, and in all price ranges. Briefly, there are bottom-up dehydrators and top-down ones — they blow the warm air either from a fan at the top of the unit or the bottom. The downside to both of these is that the food nearest the top or the bottom will dehydrate more quickly. You can rotate the trays as a work-around, but if you are buying a new dehydrator, get one that blows the warm air from the side. This distributes the air far more evenly. I currently use the Cosori brand because I wanted all-stainless steel. For many years, Excalibur was The Brand to own, and it’s still in the list of top preferred brands.
- Fruit leather sheets or dehydrator trays for fruit leather. The best choice are the trays with a raised rim around the edges to hold in the puree slurry. There are so many different varieties now than when I first started with my ancient little Nesco dehydrator.
- Parchment paper. You can use this instead of fruit leather sheets, although the puree is more likely to stick as it dries. Parchment paper really comes in handy when your fruit leather is dry. Flip it over on to parchment paper, and then cut the paper and fruit leather into strips and roll up for storage.
- Blender or food processor. This is one tool that’s a necessity in order to get the puree to the smooth, desirable consistency.
PRO TIP: If you want to use your dehydrator to make yogurt, get one that allows you to empty the unit of its trays and have an open area for jars.
Basic Homemade Fruit Leather Recipe
Time needed: 1 day
Puree your favorite fruits, spread them thinly on dehydrator trays, and let them dry for a tasty and healthy snack.
- Prepare the fruit of your choice
Depending on the fruit, wash, peel, coarsely chop and/or remove any seeds. Plan on a total of two cups per batch.
- Puree fruit
Put the fruit in a blender on the “puree” setting. Blend until your solid fruit is now a liquid.
- Simmer puree (depending on fruit choices*)
Simmer your pureed fruit over the stove. Your puree is ready to be put into the dehydrator when a spoonful of your fruit dropped onto a plate no longer bleeds any watery liquid. The benefit here is that you will be able to fit more solids onto your dehydrator tray and thus get a thicker piece of fruit leather.
*See chart below for a list of fruits that need to be simmered first. - Spread puree on fruit leather sheets or trays
Spread your mixture onto your fruit leather trays evenly, about 1/4″ thick. In a pinch you can use parchment paper, I use this brand, but it does tend to get wrinkly when absorbing the liquid from your fruit. so for best results, you really do need to invest in the fruit leather trays. Spread the puree to about 1/2″ from the edges.

- Dehydrate
Set your dehydrator for 135°F. Once the fruit leather mixture is in the dehydrator, expect it to take somewhere in the vicinity of eight hours before it’s ready. Water content and the thickness of the puree makes this variable. Basically, it will be done when it’s done. Take if off the fruit roll trays when it is still pliable, but no longer gooey. If parts of the fruit stick to the tray or parchment paper, continue drying for another 5-6 minutes.
If you’re using your oven, set it at the lowest possible temperature. For most ovens, this will be 170°F. If your oven’s lowest setting is higher, crack the door a bit to allow some heat and moisture to escape and use an oven thermometer. Use the same guidelines for dehydrating time and check for the same signs that your fruit leather is done or needs more time in the oven.
- Cut into strips and store
When the fruit leather is dry and can be peeled away from the tray or parchment paper, smooth it out onto a fresh sheet of parchment paper. With scissors, cut the fruit leather/paper into strips 2″ wide. Roll up the strips (fruit leather and paper), and store them in a jar or other airtight container. The parchment paper keeps the fruit leather from sticking to itself.


Which Fruits Should Be Simmered Before Making Fruit Leather? (Quick Guide Chart)
The very simplest fruit leathers, say those primarily made of applesauce, won’t need to be simmered, but a number of fruits need this extra step for a number of reasons.
- Dense fruits like apples need to be cooked in order to be soft enough for a smooth consistency.
- Simmering evaporates excess moisture which speeds up the dehydrating process.
- Heating activates the pectin in fruit, which is what gives fruit leather that chewy, leathery texture.
- Mellows some fruits for a better flavor.
You only need to simmer the fruit, along with a liquid (water or a fruit juice) for ten minutes or until the fruit (and peels, if included) are tender.

How to Tell When Fruit Leather Is Done
Knowing when fruit leather is done is one of the most important steps, and the easiest place to go wrong. Under-dried leather will be sticky and spoil faster, while overdried leather becomes brittle and cracks. That over-dried leather is edible — it just won’t be real fruit leather.
The 5 Signs It’s Perfectly Done
1. It’s no longer sticky
Lightly touch the surface. It should feel dry and smooth, not tacky.
(A slight softness is okay, but no wet spots.)
2. It peels away easily
Lift a corner and begin peeling it up. If it’s done, it should come off the parchment or silicone mat without tearing or sticking.
3. It bends without cracking
Fruit leather should be flexible and rollable, not stiff or crumbly.
4. The color is uniform
No darker wet spots in the center or lighter overdried edges. To regularly achieve this, you might need to practice getting the puree evenly spread as well as timing the dehydration time.
5. No indent when pressed
Gently press with your finger. If it springs back without leaving a dent, it’s ready.
Quick Test Method (Very Reliable)
Turn off the oven or dehydrator and let the leather sit for 5–10 minutes.
Then test again:
- If it becomes sticky as it cools, it needs more drying.
- If it stays smooth and flexible, it’s done.
What If It’s Not Done?
Return it to the oven or dehydrator for another 30-60 minutes. Rotate the trays if needed for more even drying.
The biggest mistake people make is relying on time instead of texture. Drying time can vary by hours depending on the fruit, thickness, and type of dehydrator, but the texture tells the truth every time.
Common Mistakes to Avoid
Even though fruit leather is simple to make, a few small missteps can lead to sticky, uneven, or disappointing results. Avoid these common mistakes and you’ll get consistent, great batches every time.
1. Spreading the Puree Too Thick
If the layer is too thick, it won’t dry evenly, and the center will stay sticky while the edges get dry and brittle. Aim for about 1/8″ to 1/4″ thickness and spread as evenly as possible.
2. Uneven Spreading
This is one of the most common issues. It takes practice to get this right. Thick spots will stay wet and thin spots get brittle. Use an offset spatula, and take your time to smooth the puree evenly.
3. Using the Wrong Surface
Using wax paper or skipping a liner leads to sticking, tearing, and ruined batches of fruit leather. Always use parchment paper or a fruit leather mat.
4. Drying at Too High a Temperature
Too much heat can cook the fruit instead of drying it and cause the edges to become hard and crack. Stick to low temperatures, (about 135–170°F depending on method).
5. Not Drying It Long Enough
Underdried fruit leather will feel sticky, spoil faster, and be hard to store since it will be harder to remove from its parchment paper. Check for dryneess using texture, not just time.
6. Overdrying
Leaving it too long can result in brittle, cracked leather that won’t roll properly when finished. Pay attention to its dryness and test to see if it’s finished. Remove it from the dehydrator or oven once it’s flexible and no longer sticky.
7. Skipping the Taste Balance
Using only tart fruit can lead to a sharp or unpleasant flavor. Combine fruits or add a little honey or maple syrup if needed.
8. Not Rotating Trays (Oven Method)
Ovens and top/bottom drying dehydrators often dry unevenly. This causes individual trays to dehydrate unevenly, and even one side of a tray might finish faster Avoid this by keeping an eye on the trays throughout the process and rotate halfway through drying.
9. Forgetting About Storage Conditions
Even perfectly made fruit leather can fail. It contains between 10-20% moisture, so although it’s been dehydrated at a safe temperature, it can still be spoiled. Store it in air-tight containers, like large canning jars, and make sure it is fully cooled before storing.
When you use overripe fruit, you’ll get a fruit leather that is naturally sweeter.
Flavor Ideas and Combinations
If this is your first time making fruit leather, I recommend starting with applesauce-only. You can bougie it up with cinnamon, maybe a tiny bit of ginger, but keep it basic. Follow the instructions above (no need to simmer), and learn the process. Then, try some of these more exotic types!
Start With Your Favorites
No need to begin with a quince, kiwi, and nectarine combo — not even sure what that would taste like! Just start with what you and your family already like.
Single-Fruit Options (great for beginners)
Apples (applesauce) — Smooth, mild, and reliable. Fresh apples will need to be peeled and simmered first.
Mango — Naturally sweet and makes a soft, chewy leather. This is my family’s favorite. I sprinkle a little chamoy powder on top about halfway through the drying process, so we get the flavor of chamoy directly without it being mixed in with the fruit.
Peaches or nectarines — Bright flavor and good texture, and when peaches are in season, there’s nothing better.
Pears — Subtle and slightly sweet. This is one you’ll want to simmer beforehand.
Classic Fruit Combinations
These pairings are classics. You can’t go wrong with any of them, and you can always tweak the combination with ingredients like honey, a sprinkling of cinnamon, and so on.
- Strawberry + banana — Sweet and creamy. Be sure to use the bananas when they first get brown spots for the sweetest flavor.
- Apple + cinnamon — Tastes like apple pie. Peel and simmer fresh apples for about ten minutes in water or fruit juice.
- Peach + raspberry — Sweet with a slight tart edge. The classic peach melba flavor.
- Blueberry + apple — Rich flavor with smooth texture.
- Mango + pineapple — Tropical and naturally sweet. Important: fresh pineapple needs to be simmered for 10-15 minutes to remove the bromelain, an enzyme that will keep fruit leather from drying properly. Canned pineapple can be pureed right from the can.
How Much Fruit Should I Use?
This has a quick and easy answer — a standard batch of puree for homemade fruit leather is about two cups.
If you want to combine fruit, then use these measurements/proportions:
50/50 — Equal parts of each fruit. This is a good default when both fruits are similar in water content and sweetness (strawberry + mango, blueberry + banana) and also when you’re starting out and unsure of which flavor you prefer as the dominant one.
70/30 — When one fruit is the star and the other is a supporting flavor or thickener, like the combination of apple with a cinnamon-spiced pear or mango and raspberry.
60/40 — This is a middle ground when you want the second fruit present but not dominant
A good rule of thumb is to start with 50/50, taste, then adjust the next batch based on what you want more or less of.
PRO TIP: Banana is a popular ingredient, but should almost always be the minority fruit (¼ to ½ cup per batch) because it overpowers flavor and can make the leather too stiff.
How to Store Homemade Fruit Leather
By its nature, fruit leather is on the sticky side, so it’s imperative to store it properly if you’d like to have it on hand and fresh weeks or months in the future.
Proper storage is what keeps it fresh, flavorful, and safe to eat. Once it’s fully dried and cooled, a few simple steps will make a big difference in how long it lasts.
Step 1: Cool Completely
Before storing, let the fruit leather cool to room temperature. If you store it while it’s still warm, moisture can be trapped, leading to mold and a sticky leather that’s difficult to handle and eat.
Step 2: Cut and Roll
When the fruit leather is completely dry slide it on to a clean piece of parchment paper. Cut the fruit and paper into strips using scissors, and you’ll have your roll-ups ready to go. I prefer this method since it keeps the fruit leather from sticking to the other layers.
Step 3: Choose the Right Container
Short-Term Storage (up to 1–2 weeks) — Store it in an airtight container — my preference is a large Mason jar. You can also keep it in a zip-top plastic bag. Store it at room temperature in a cool, dry place. If you live where it’s humid, use the jar storage method, not the plastic zip-top bag.
Longer Storage (up to 1 month or more) — If you want to store this long-term, again, use the airtight container and store it in the refrigerator. Remember, even well-dehydrated fruit leather has a moisture content, and over time, that can breed bacteria as your homemade fruit leather doesn’t contain any type of preservative.
Step 4: Protect From Humidity
Fruit leather can absorb moisture from the air, which makes it sticky. If you live where it’s humid, you need to be extra cautious because ambient humidity will affect the fruit leather. You can layer parchment paper between fruit leathers or use the roll-up technique described in Step 2.
Step 5: Freezing for Long-Term Storage
If you really want to store your fruit leather long-term, you can freeze it. The best way to do this is layer the fruit leather with parchment paper and seal it in a vacuum-sealed bag. This keeps out moisture, protects from freezer burn, and keeps it fresh for months or much longer. Thaw it to room temperature before eating.
The key to long-term storage is all about protecting it from humidity once it’s done
Tips for Making Homemade Fruit Leather
Fruit leather is fairly straightforward — the ingredients are simple, the process is simple — but a few refinements can help ensure you always have a great result.
Create slightly thicker edges. The edges dry more quickly than the rest of the puree, so this helps the entire sheet finish dehydrating at the same time.
Tap the pan to remove air bubbles. I’ve found that my food processer and blender create air bubbles in the puree, so this one steps helps remove them. Fewer air bubbles means the fruit leather will be more evenly dried.
Start drying slightly warmer, then lower the temperature. This jump-starts the evaporating without overcooking and is for the oven-drying technique. Start at ~170°F for the first hour Then reduce to ~140–150°F.
Don’t skip the “conditioning” step. After drying, stack pieces of fruit leather loosely in a container for 24-48 hours. Watch for any condensation, and if you see it, the fruit leather needs more drying. This step helps equalize any moisture in the fruit leather, improving shelf life.
Score the sheet of fruit leather before it’s fully dry. When it’s almost done, in the final 30-60 minutes, lightly score the fruit leather with a knife or pizza cutter. This will make cutting it a lot easier.
Rotate AND flip. If your fruit leather is stubborn, meaning that it just doesn’t seem to want to dry evenly, the center stays sticky, or it won’t peel off cleanly from the parchment paper or tray, try this. Flip the sheet of leather over, peel off the paper (if using it), put it on a fresh surface, and continue drying for another 30-60 minutes.
Advantages of Homemade Fruit Leather
When I was a kid, roll-ups were very heavily marketed with their neon colors and interestingly-shaped cutouts. Technically, the fruit roll-ups you buy at the grocery store are made of fruit (pear slurry, mostly), but they are so chock-full of corn syrup and artificial colors and flavors that you would have to split some very fine hairs when calling it a “healthy snack.”
Let’s compare this to the homemade variety. When made correctly, fruit leather contains: fruit. If you feel like it, or if your fruit is especially tart, you may choose to add a small amount of a sweetener, like honey or maple syrup, but the amount of sugar it contains is completely up to you.
With homemade fruit leather, you get to experiment with flavors, additional ingredients for bonus nutrients, and use up fruit that may be over-ripe or almost ready for the trash bin.
Frequently Asked Questions
Wash and remove any pits or cores from your chosen fruit. You can then chop, slice, or dice it depending on your preference.
Peeling is optional for many fruits, especially if the skin is thin and soft. However, thicker skins like mangoes or pineapples might be better peeled for a smoother texture.
At room temperature, plan on about 1–2 weeks if you keep it stored in a dry location and in an airtight container. In the refrigerator, up to three or four weeks, and if you store it in the freezer, several months. Humidity plays a big role. Store in the fridge if your kitchen is humid.
For lining dehydrator trays when making fruit leather, silicone fruit roll sheets are the preferred choice. These reusable sheets are non-stick, allowing for easy removal of the finished leather without tearing. Parchment paper can be used in a pinch, but it wrinkles easily, may tear when removing the leather, and isn’t reusable. While silicone sheets are generally more expensive, their reusability and functionality make them the better option in the long run. There are trays for some dehydrator models.
Dehydration time varies depending on the fruit, thickness of the puree, and your dehydrator’s model. It typically takes 6-12 hours or more. The leather is done when it’s no longer sticky but still pliable.
Yes. You can use your oven set to its lowest temperature (usually 150–170°F). Leave the door slightly cracked to allow moisture to escape and expect drying to take 6–8 hours or longer. You’ll need an oven thermometer to ensure your oven is at the right temperature.
Sticky fruit leather usually means it needs more drying time. It can also happen if the puree was spread too thick, the humidity is high, or the fruit used had a high water content. Return it to heat for another 30-60 minutes, and check again.
This happens when it’s overdried. Next time, check it earlier, and remove it when it’s still flexible and slightly soft. If it’s already brittle, try placing it in a large, airtight jar with a slice of apple for moisture, and see if that softens it up a bit.
Yes. Just thaw it first and drain any excess liquid. Frozen fruit works very well and is a great option when fresh fruit isn’t in season.
No. If your fruit is ripe, it should be naturally sweet enough. You can add a small amount of honey or maple syrup if needed, especially for tart fruits. Also, try combing a tart fruit with one that is sweeter, such as pear or peach.
Fruits like apples, mango, peaches, and pears work very well. Berries are great too but often benefit from being mixed with another fruit for better texture and balance.
It likely isn’t fully dry yet. Return it to the oven or dehydrator until it peels away easily. Using parchment paper or a silicone mat is essential to prevent sticking.
Related Dehydrated Food Content
Get your FREE Build a Balanced Pantry ebook!
Would you like more help putting together your emergency food storage? I created a FREE ebook to help you build a balanced pantry to help you do that! In it I share more simple tips and explanations to help you create an emergency food supply that will provide nutritious and simple meals in an emergency. Get that free build a balanced pantry ebook here.
Final Thoughts
Homemade fruit leather is one of those simple projects that delivers far more value than you expect — it turns fresh fruit into a practical, long-lasting snack your whole family will actually enjoy. With just a little practice, you’ll get a feel for the right thickness, drying time, and flavor combinations that you and your family like best. Whether you’re using up extra fruit, packing lunches, or having something healthy on hand for snacks, this is an easy skill that pays off again and again.
I want to learn a lot of things 2.Healthy Food ‘s for si Diabeties I am a Diabetic .I needt to learn more about food form
I need to learn more about how to prepare for for being a diabetic,
As well as other things many different things
I have a dehydrator that came with solid sheets to put over the trays. I made fruit leather before but it would not come off the solid tray. Am I doing something wrong? Should I use oil on the tray first/ Any advice you can give is appreciated. Thank you
Sorry for the late response, Audrey. If you use a spray like PAM or similar on the sheets, it definitely makes it easier to peel the fruit leather off. You could also use a very light coating of coconut oil. However, if you use any oil, it won’t be long before it becomes rancid.
Instead, I recommend using fruit leather sheets. They will release the dried fruit leather more quickly and shouldn’t warp over time. LINK: https://amzn.to/3StfIp2