
Store-bought yeast has a pretty short shelf life, and if you’ve ever gone to bake bread during a shortage, maybe you just realized your packet expired two years ago, you know exactly why this skill matters. I’ve had good luck proofing yeast I thought was long past done, including a 2-pound package I’d had in the freezer for over 10 years. This walks through three methods for growing your own starter from scratch using raisins, flour, or potatoes, plus how to feed and maintain it so you’re never without yeast when you want to bake a loaf of bread.
Do you know how to make your own yeast? One downside of being an avid or even casual breadmaker is the possibility of running out of store-bought yeast. Remember when flour and yeast were in short supply during the pandemic in 2020? Anyone can learn how to make yeast from scratch. Here’s how!

Some of the links in this post may contain affiliate links for your convenience. As an Amazon Associate, I may earn a small commission from qualifying purchases without any increase in price to you.
Table of contents
What is Yeast?
Yeast is a tiny living organism that belongs to the fungus family. It’s commonly used in baking and making bread. When you mix it with sugar and warm water, it becomes active and starts to grow. As it grows, it produces carbon dioxide gas, which makes dough rise and become fluffy when you’re baking bread.
So basically,yeast is a tiny living thing that helps make bread soft and fluffy by producing gas.
Both wet and dry versions can be used in baking. Wet yeast, though, because 2/3 of it is moisture, doesn’t have the shelf life that we preppers typically want.
How long does store-bought yeast last?
The average “best by” date on commercial varieties is 2 years. Once opened, it must be kept cool and dry. In a refrigerator, it can remain good for up to 4 months; in the freezer for 6 months.
Occasionally there are people who have had success with older yeast. (I’m one!) The general rule of thumb, though, is that store-bought is for the short term.
How to test yeast to see if it’s still good
If you have store-bought yeast stored longer than the above-mentioned time frames,follow this simple test to proof it and see if it’s still active. I was amazed when a large, 2-pound package I purchased more than 10 years ago was still active. So glad I hadn’t thrown it out!
Proof your yeast
- Dissolve 1 teaspoon of sugar in 1/2 C warm water from the tap. Between 110°F-115°F is most effective. The only way to really be sure about the temperature is to use a thermometer. When in doubt, the water from your faucet should be warm but NOT hot to the touch.
- Stir in your dry yeast, either one 1/4 oz. packet (7g) or 2 1/4 teaspoons of granulated yeast. Most people say that the yeast should be brought to room temperature first, but I have always had good luck when using it straight from the freezer.
- It only takes three or four minutes for the yeast to “wake up” and start to rise. After ten minutes, the surface of your yeast-water mixture should have a foamy top. If so, then congratulations! You have active yeast! It should be used immediately.
- Most recipes take into account the liquid needed to proof yeast. If yours does not, deduct 1/2 cup of liquid from your recipe if you proof the yeast with this method.
A good way to tell if your yeast has risen sufficiently is to use a 1 C measuring cup. If the yeast foam reaches the top, you’re good to go. If your leavening agent has an insufficient rise, it will not be any good for baking. Best to throw out the entire container.
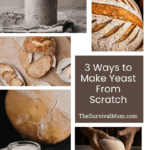
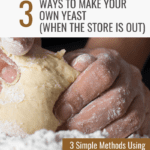
Step 1: Three Methods To Make Starter Yeast From Scratch
If you can’t get to a grocery store for Fleischman’s, what’s the alternative? Try growing your own yeast!
Here are a three methods that should fit most needs and skill levels — starting with raisins, flour, or potatoes. You might have more success with one than the others, and in my experience, once you get the starter going, that’s all that matters.
Once you have your jar of starter, your next question will be, now what? In this post I show you how I use this starter to bake a loaf of bread.
From Raisin / Fruit Yeast
Ingredients
- Clean Glass jar. (24oz. or larger) Sterilize in hot water and allow it to dry.
- Water. Clean, filtered, or bottled is good. Tap water can be used, depending on your local conditions. Warning: Too much chlorine in your water, or water that is too basic, can kill the yeast.
- Raisins or other fruit. Most fruits have traces of yeast on their skins. Note that you may not get as good of a result with fruit that has been washed and waxed.
Instructions
- Place three to four tablespoons of raisins in your jar. Adding a few tablespoons of honey or sugar will facilitate the fermentation process.
- Fill the jar ¾ full with water. Place the lid on the jar lightly. Do NOT tighten the lid – you will want to allow some air to escape.
- Place jar at constant room temperature. Do not allow the jar to get cold. This will kill off the yeast and stop the process.
- Stir at least once a day for three to four days.
- When bubbles form on the top, and you smell a wine-like fermentation, you have yeast. The raisins, or fruit, should be floating.
- Before adding additional flour and water to feed your new yeast, remove the raisins and discard.
From Grain/ Sourdough Starter
Yeast is already present on grain. All you need to do is to cultivate it in a manner similar to the above instructions. Here is a basic recipe for a sourdough starter.
Ingredients
- 1 1/4 C unbleached all-purpose flour or milled wheat berries
- 1 C clean warm water
- 1 sterile jar with cheesecloth or lid
Instructions
- Mix the flour and warm water, and keep it at room temperature.
- After several days, the mixture will start to bubble and will begin to rise.
- At this point, you’ll begin to feed your yeast and help it grow and develop into a true “starter”.
- Keep your starter in the refrigerator when not in use. Use as you would any sourdough starter.
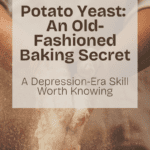
From Potatoes
The starch in potatoes makes it another prime candidate for yeast production.
Ingredients
- 1 unpeeled medium-sized potato
- 4 C warm water
- 1 tsp salt
- 1 tsp sugar
- 1-quart jar
Instructions
- Rinse your potato to remove dirt, but don’t scrub it too much.
- Cut it into pieces to facilitate cooking, then boil until cooked through.
- Drain, and save the water.
- Mash the potato and add sugar and salt.
- Allow mixture to cool until it is at room temperature.
- Add water to the potato mash until the whole mixture equals 1 quart.
- Cover and let sit in a warm place and allow it to ferment for several days.
- Pour the mixture through a sieve to filter out the potato sediment. Save the liquid starter and begin to feed it following the instructions below.
Step 2: Feeding the Starter
Once you have created your own starter, you must “feed” it regularly. This means adding 1 cup flour and 1 cup of water to the mix so that it can keep growing. You will need to feed the starter daily if it is at room temperature or weekly if it is in the fridge.
It usually takes another 5-6 days of feeding your starter before it’s ready to use in baking. Use these instructions to begin to bake bread.
If you don’t bake bread that day, you will also need to toss out one cup of the starter after feeding so that the ratios stay the same. This is an important step and can be a great motivator to bake regularly so that none of your hard work goes to waste!
I have my yeast, now what?
No matter which method you choose, making your own yeast is a skill that dates back thousands of years. Begin practicing using your DIY yeast to make bread and post your results. Feel free to add your own ideas and advice in the comment section below.
Do you know how to make yeast from scratch? Share your experience in the comments!
This article was originally published in 2011. It has been updated and revised.
This is such a timely post! I was just thinking about this very issue a week ago…I had some sourdough starter I had dried and put into the freezer last winter (with the intention of being able to “awaken it” at a later date. (I got tired of feeding it/ and hadn’t been baking for a spell. Well, the darn stuff wasn’t viable, had to cheat and put some store bought yeast in to get the bread going.. Anyway, I am printing off your article at this very moment, to put in my resource folder. Thank you! DM
I have been making my own yeast, twice in my life, the current starter is about eight years in selection. This starter is used in whole grain and bean flours, half of which has been undergone maltose conversion and hydration. Just recently, I have utilized it in juices with cane sugar, for a daily dose of biotic saccharomyces. Truly a great deal of nutritional involvement, with these cultures.
Thank you for the information, but how do I use this yeast in my usual bread recipes?
Hi, I make wild yeasts from wild fruits, berries and wild herbs. I was instructed to always use 1/2 cup for each loaf of bread. I make french bread or lion house rolls a lot during the week and this has always worked :). Also, each fruit, berry, herb, etc will flavor your bread a bit different. For instance my wild grape yeast was surprisingly sweet so I use less sugar in my white/french bread. Sweet potato yeast is very sweet as well. Herb yeast will have a bit of the plants oil/flavor. Most of the time origin characteristics disappear in baking no matter where you get the yeast from. Also, don’t forget, flour and water in a lightly covered bowl, placed in your garden in spring time will pull wild yeasts from the air making an amazing yeast for baking! Happy baking.
Awesome ideas!!
I AGREE!
These HOW TO articles always tell us how to make a big ol’ bucket of yeasty watery mess; But I have yet to read one that will tell you HOW MUCH OF THAT YEASTY WATTERY MESS DO WE PUT IN OUR RECIPE. We understand that if you use a half of a cup of it then we are replacing a half of a cup of the liquid in the recipe. We still do not know how to equivicate dry yeast packets to this yeasty wattery mess we just made.
Agree
Have you used a grain free root such as arrowroot or a but like cashews (although a legume) to make starter? If so would you please share your results?
Now I will never go without beer….hehehe
You are right you can make beer bread! It is pretty simple, and it turns out very good!
I was also wondering about using this yeast in bread. If the recipe calls for 1 packet of yeast, how much of this do I use? Thanks!
I would also like to know how much to use in recipes.
I have seriously always wanted to try this! It’s just so fascinating to me.
Sounds very interesting, but brings up lots of questions: Do you leave the rasins in the jar? How do you scoop out the yeast? How much do you use? Do the different varieties of hommade yeasts you show have different flavors? If so, which is best for baking bread?
In the potato method everything has been boiled,therefore any yeast must have been killed. Where does the starter come from?
How long will the raisin fruit yeast last in the refrigerator and how much should I use?
With the fruit method, basically, it says, “Now you have yeast.” In what? The water? Do we remove the fruit and then use the 1/2 C water as stated in one of the earlier comments?
Sorry, I’m really new at making yeasts, your method sounds so easy, but I have a few questions:
Do I ‘Feed’ the potato starter on the second day or wait until it ferments? In the potato method, you replied yo use 1/2 c. per loaf, but do I need to strain the potato skins out?
Well… This is all about fermentation… There’s no yeast on fruits – you can wash it… There’s no yeast in grains… All that happens is that the sugars start to change into alcohol… This makes bubbles you need for your bread… The more “bubbles” (yeast) you use in you dough the less time it will need to rise… There’s no need to add any sugars to the fruits! Fruits contein lots of their own sugars!
The best way to bake a real bread is to use “yeast” made from rye flour… no other… It works best and it is used by bakers all aroud the world for ages! 😉
Please, I need gluten free yeast and bread recipes. Can you help as my husband would love to have a good pizza again as well as bread that tastes good. Thank you
Judy Rodacker,
I have made a sour dough starter using equal parts brown rice flour and water. I feed it twice a day (roughly every twelve hours) 1/4 cup each flour and water. Cover the jar with a coffee filter and jar band. After a few days it will get very bubbly and rise quite a bit between feedings. At that point remove half of the starter so the ratio will stay good and use about 3/4 of a cup of it for a loaf of GF bread. You can’t use just any gf flour blend for your bread or it won’t work. I do know Pamela’s Artisan blend works great (king Arthur and bobs redmill doesn’t.
In a bowl, add 2 1/2 cups of GF all purpose flour be sure it contains xanthum gum or some type of gum
3/4-1 tsp salt
2 tsp sugar or honey
1 1/4-1 1/2 c warm water (about 100 degrees F)
1/4 c. soft unsalted butter (not margarine)
2 large eggs
3/4 of starter
Beat on medium with electric mixture for a couple of mins.
Stir in By hand 1 additional cup of GF flour. If necessary add additional water 1 or 2 TBSP at a time until dough is a stiff paste (it should be very stiff but still be sticking to the sides)
In a well greased loaf pan lined with parchment paper (at least the bottom) scoop batter into it being sure to press into the corners well. Shape top into rounded loaf if desired with back of wet spoon. Cover loosely with plastic wrap sprayed with cooking oil and place in warm draft free area for 3 – 8 hours until almost double in size. Bake in preheated oven at 400 for 30 mins. Turn half turn and reduce heat to 350 and bake another 30 mins. Done when tapped it sounds hollow AND internal temp reaches 200 degrees. The bread will remain a very light brown.
PLEASE NOTE!! It’s important that your starter has been fed within the last 12 hours before you make the bread.
Also, if you have a dough attachment to a standing mixer you can add all the flour at the beginning.
If you want an even softer bread, you can use milk instead of water or any even substitute part of the water for heavy cream.
How long it takes your bread to rise depends on how warm your house is and other factors. It is hard for this type of bread to over rise. I recommend making in the morning to give yourself all day until you have an idea of how long it will take.
I only use brown rise flour with no other ingredients for my starter. Store it in frig with a lid on it if you don’t want to have to feed it every day between bread making.
Thank you for this! I don’t typically bake gluten-free, so this is helpful to me and all of my readers here.
I like tis article, but I take way too many short cuts, yeast, flour and patience my bread lately is flat. I am assuming “GF” is Goldmedal Flour?
GF is gluten-free.
3/4 starter? 3/4 teaspoon, cup, quart?
Your husband’s problems isn’t gluten, honey. It’s brominide toxicity found in all commercial flours, pies, cakes, pizza, pasta, soda’s, citrus drinks, brominated vegetable oils, beer, etc. It will kill you overtime. Brominide also fools the body into thinking it’s iodine and throws the thyroid off. It also causes developmental and cognitive delays in children, especially in the womb. Iodine was pulled out of commercial breads and replaced with brominide back in the 70’s. Look at our children and grandchildren now. Brominide is used to make plastic for cell phones, computers, dashboards in cars, etc. and yet they’re feeding this to us and our kids. But, I bet the owners of these companies are not feeding they’re families that crap.
There is no super food that will give you eternal life you’re going to die no matter what you eat.
Worry less, enjoy more.
You scare me.
Wow this article was such a great find! Thank you so much for sharing this. I am super excited to incorporate a new method of yeast making. On another note I must acknowledge the info that Shirley has shared (hopefully this helps some people as well). I am 100% on board with what Shirley is saying and why making your own yeast and the type of flour we use is so important (especially those who believe they are gluten intolerant).
The iodine receptors in our body fit other toxic elements that do not belong in the body. For example, not just bromide, but fluoride, chloride, and another “ide” that I can’t remember. The point is, these “ides” all fit the iodine receptors in the body. Iodine is essential to life. You need iodine like you need air, it sounds extreme but it’s true. No one can survive without it. Making your own starter from unbromated flour is the best.
That said, Shirley mentioned how toxic bromine (bromide) is to the body and how people are not actually intolerant to the glutens, but to the toxins that deflect us of iodine. Because bromine fits the receptors meant for absorbing iodine, our body becomes deficient in iodine. They add this to bread for two reasons that I’ve heard: as a really bad iodine replacement, and as a preservative. Bromide helps keep wheat bugs out of wheat. Another thing that happens with flours is that they are stripped of essential oils removing some of the beneficial nutrients. This is what gives it a longer shelf life in your grocery store.
I do buy flour, but I always buy organic, unbromated flour. If it doesn’t say “unbromated” then it contains bromine (bromide). Period.
As Shirley mentioned, people believe (because they are told) that they have a gluten intolerance. Removing the essential oils coupled with adding bromine is truly the issue here. Nutrients is removed and toxins are added.
The function of the thyroid is to fight disease and illness. Iodine helps your thyroid convert T3 into T4 (or the other way around; I apologize if I have screwed up the order). Without this conversion your body can’t fight illness as effectively as it would if it was not iodine deficient…which, unfortunately most people are.
Again I emphasize, if possible buy organic (and unbromated) flour. But even better, if you are able to mill your own wheat you will have the added nutrients of the oils.
The reason they strip essential oils from the bread is because if they did not, bread would go rancid pretty quickly after milling (the grinding of wheat berries to make flour). I can only imagine the process flour goes through to remove the essential oils. Leaving in the essential oils obviously shortens the shelf life so it would seem like greed wins out here. Producers are making money off of sick people who consume their products. You can get iodine from things such as kelp, spinach and sea moss, but it’s very hard to get enough…and the iodine that is consumable they have removed from store shelves and not enough people are asking why. What’s the real agenda here?
Anyway I really enjoyed this article and will also be adding it to my starter recipes! I just had to respond to Shirley’s comment because it very important what she has shared. Also, thanks for letting me share ❤️
Thanks for your very useful information on the subject. I believe a lot of people’s food allergies and intolerances stem from what has been done to our food supply by Big Ag, Big Corporate food processing companies, and probably even Big Pharma.
Shirley your comment was very poignant! See my longer post. Thank you for sharing your knowledge on this.
People never want to know the truth. Good tip!
Question to Shirley, what flour do we use? I agree, bread has changed considerably since I was young. But please, I need to know where I can get these flours.
David, you can buy the organic which I believe by law is supposed to be unbromated. HOWEVER, don’t quote me on that. ALWAYS read the package to see where organic flour may list that it contains no bromine (it may say never bromated, or no bromine, or unbromated…al the same). I buy King Arthur’s organic flours (all purpose or bread flour). It says it bromine free on the back of the sack. But it is also better to mill your own flour if that’s possible. See my other post as to why. It was a response post to “Shirleys” post.
Have fun baking!
I’d love to mill my own flour! Aspirations! : }
Good Morning !
I just found this post and it is very informative !
I do have a question…
I love the ideas of how to make different starters, but have you written a follow-up on how to use them ?
That would be a great addition to this wonderful post !
Happy New Year !
Patti
Great information! Going to try it out today.
Don’t throw out old yeast. Toast it in a skillet to make nutritional yeast.
I’ve never tried that before, and we do use nutritional yeast in some of our recipes. Thanks for the tip. I’ll give it a try!
Without trying it to find out? What happens that is so unpleasant if it gets into the compost pile (the amount discarded that isn’t used during the feeding process)
I haven’t done this, either, but suspect that yeast growth would not be a positive thing in a compost pile.
Okay, so if I do the raisin/fruit method…do I take the fruit out? Does it stay? If I keep feeding the starter does it always stay on the counter or in the fridge? I’ve never done this before but it just seems like things would turn bad. But I’m sure that’s just my inexperience talking…
Take the fruit out when you begin feeding your starter with flour. If you’ll be making bread within a few days, you can leave the starter on your counter. Keeping it in the fridge will slow down its activation, which is good if you won’t be making bread for a while.
The Only Superfood that is going to give you Eternal Life is Jesus Christ!
My wife and I have had a two pound block of yeast in our freezer for the past two years. It’s still fine when thawed.
Yep! I was amazed when our 10 year old yeast worked fine for bread.
Wow, is this ever confusing for me! So many links and different instructions. I don’t really know where to start. Is there an easier version for old people? Thank you!
Hi Marie! Making your own yeast is the same as making a “starter”, which is what sourdough bakers use in place of dry yeast. The article gives you three different ways to get the starter going using raisins, flour, or potatoes. You want to end up with a very bubbly mixture, and then begin feeding it with a small amount of flour every few days. The starter will grow and expand, and you use it by scooping out a certain amount and adding bread-making ingredients to it.
The first thing is to get the starter going with raisins, flour, or potatoes. These seem to be the easiest ways to make a starter for most people. There’s a follow up article we link to that explains the next step — actually using the starter to make bread.
Let me know how this works out for you!