


You can build a solid bug out bag for less than $35 per person by pulling clothing and supplies from home and filling the gaps at dollar stores and big box stores. Start with the emergencies you’re most likely to face, pack for three days, and prioritize water, food, and first aid. Here’s how I put together these kits on a tight budget.
When I first sat down to build bug out bags for our family, my list went on and on. Adding it all up for four people was enough to make me want to quit before I bought a thing, and there was no way a regular backpack would hold everything on that list anyway.
My starting point was tracking down backpacks for each person, and since my kids (ages 7 and 9 at the time) already had those, and my husband and I had heavy-duty packs from camping trips, this cost zero dollars. But then I had to figure out how to equip each bag on our single-income.
What helped was figuring out which emergencies would force us out of the house, then packing for those instead of every possible disaster. Here’s how to do the same thing for your family, with realistic prices and plenty of dollar store options.
This article was originally published in 2018 and has been updated with new tips and pricing, September 2026.

Table of contents

Some of the links in this post may contain affiliate links for your convenience. As an Amazon Associate, I may earn a small commission from qualifying purchases without any increase in price to you.
Start With Your Most Likely Emergencies
Before you buy anything, decide what you’re packing for. I did a simple risk assessment for our family and our area, and very few scenarios had us leaving home for long. In a worst-case scenario, most involved heading to a relative’s house or a hotel a day or two away, whether after a house fire or while waiting out a hurricane.
That’s why I decided that packing supplies for three days made the most sense. Three days covers most evacuations, and it keeps each bag light enough for the person carrying it as well as being within our budget.
What a Budget Bug Out Bag Costs
These are rough per-bag costs for 2026, assuming you pull clothing and some supplies from home. Prices vary by region and store.
| Category | Budget cost per bag | Where to save |
|---|---|---|
| Water | $0 | Refill used water bottles |
| Food (3 days) | $10–15 | Buy in bulk and split between bags |
| First aid | $1.25–3 | Dollar store kit plus supplies from home |
| Toiletries | $3–7 | Dollar store travel sizes or refillable bottles |
| Lighting and extras | $3–6 | Dollar store flashlights, ponchos, glow sticks |
| Comfort items | $1.25–3 | Dollar store books, games, and small toys |
| Clothing | $0 | Pull from what you already own |
| Total | About $20–35 | Even less if you have supplies at home |
One possible addition is a personal water filter in each adult’s bag. Kids can share with a parent. The LifeStraw is often on sale for less than $12, but I prefer the Sawyer filter.
I didn’t include the backpack, since there’s a good chance you already have those, and if not, they can be picked up for pennies on the dollar at thrift stores and garage sales. Some solid brand names to look for are Osprey, Fjallraven, Jansports (they have a lifetime warranty), and Eastpak. My son’s Swiss Gear backpack is at least a decade old and going strong.
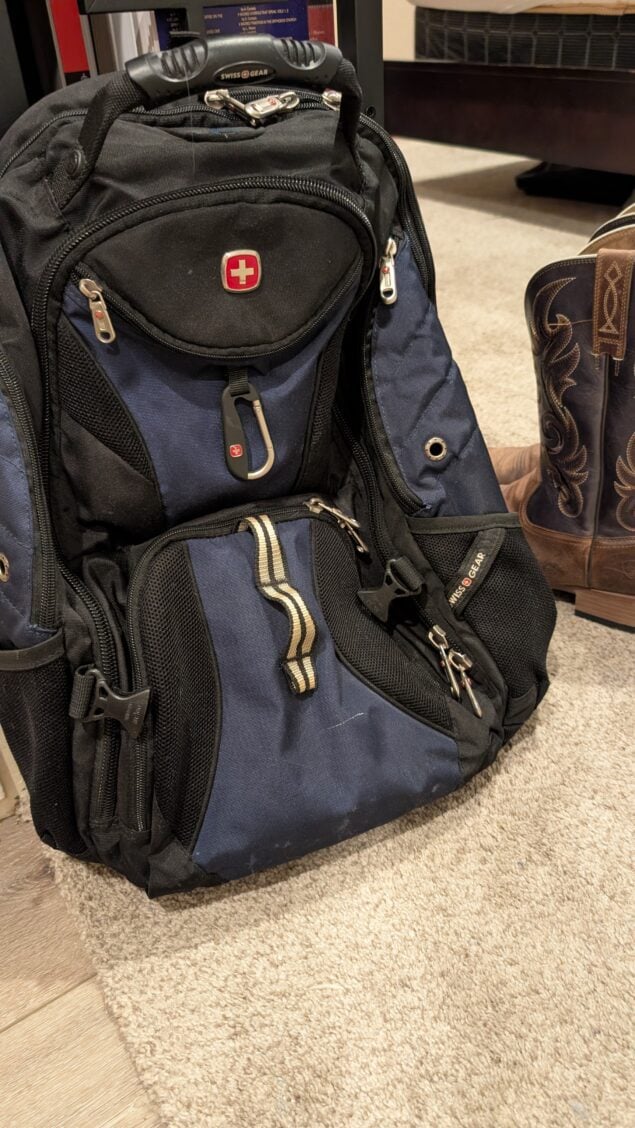
So, as long as you’re getting started putting a bag, or kit, together, you might as well look for the best-made and most durable bags possible.
Water
Water is the heaviest thing in a bug out bag and the most important. The usual guideline is a gallon per person per day, but a gallon weighs over 8 pounds, so nobody is carrying three days’ worth on their back.
Here’s what I do instead:
- Pack one or two liters of water per person in refilled water bottles. They cost nothing. It’s perfectly fine to re-use water bottles from brands like Fuji and Lifewater, but never those thin plastic disposable bottles. If you want to spend more money, an inexpensive Nalgene bottle runs around twenty bucks. I recommend getting one of these with a smaller volume, like this one for 24 ounces, if you’re concerned about the weight of your backpack.
- Put a personal water filter in every adult’s bag. This is the one item I’d spend more on, and good ones run about $15 to $30. If these are new to you, buy one and test it out. I found that the suction needed to get water through a LifeStraw is more than a younger child can manage.
- Add a few water purification tablets as a backup to your backup.
If you know you’ll be driving rather than walking, keep a case of water in the car, and read more about how to store water for emergencies.
So far, if you’re using a water bottle you already have, your cost is zero dollars. The water filter is optional, and in most cases, isn’t necessary.
Food
Food is another expense that can be as little or as much as you choose. It’s smart to buy in bulk and then split something like packets of trail mix between bags. Stick with foods that don’t need cooking.
- Trail mix, nuts, and dried fruit
- Beef jerky or meat sticks, like Chomps
- Tuna or chicken in foil pouches
- Nut butter squeeze packs (more on peanut butter as a survival food)
- Granola or protein bars
- Hard candy, which doesn’t melt and makes a good morale boost
Freeze-dried meals and MREs are great if you can heat water or have room in the budget. Freeze-dried meals in a pouch are super-lightweight, but MREs can get heavy, fast.
Add a spoon or fork to each bag (these can be plastic, no need to buy anything expensive), and rotate the food every six months so nothing goes stale.
First Aid Supplies
A basic dollar store first aid kit gives you bandages, gauze, antiseptic wipes, and a case to keep them in. I add supplies from home, including over-the-counter medications and a few days of any prescriptions, each labeled with dosage directions.
A small bar of soap rounds it out. That’s something you can bring home from a hotel stay or let a large bar of soap soften up a bit in the sunlight and then slice it into small, individual “bars”. For a bigger kit, here’s my travel medical kit list.
Toiletries
Travel-size toiletries at the dollar store are one of the best deals for bug out bags. For a few dollars, you can put together shampoo, deodorant, a toothbrush, and toothpaste in a zipper bag. If you bring these home from hotel stays, that’s even cheaper.
You can also buy refillable 3-ounce bottles and fill them from home, which costs even less if you already have the products. For more ideas, here’s a list of hygiene supplies for emergencies.
I suggest adding a small packet of wet wipes as an all-purpose and inexpensive addition in this category.
Clothing
Clothing costs nothing because it comes from your closets. Pack a complete change of clothes for each person, plus extra socks and underwear. Add a hat/cap and gloves in cold months, and swap out clothing each spring and fall so nobody ends up with shorts in January. A small fleece or crib-size blanket in each bag adds warmth without much weight.
Forget the “emergency blankets”. Those are made from thin mylar that tears easily and whether or not it truly keeps you warm is debatable.
Bug Out Bags for Kids
Kids can carry their own bags once they’re old enough to manage a small backpack. A cross-body bag sized for their height and strength level is just as good. A good rule of thumb is to keep a child’s pack at no more than about 10% of their body weight.
Young kids can carry their own clothes, a pouch of water, snacks, and a comfort item, and put the heavier gear like water bottles and food in the adults’ bags.
Comfort items make a big difference for kids in a stressful situation, and these can be free from what you have around the house or from a dollar store. Nothing fancy — small books, puzzle books, card games, and stuffed animals. I picked a couple of things for each child and varied them so the kids could trade. Notebooks and colored pencils from home don’t cost a thing.
Family Bug Out Bag Checklist
Some items belong in every bag, and others only need to go in one adult’s bag for the whole family.
In every bag:
- Water bottles, one or two liters
- Three days of no-cook food and a spoon
- A change of clothes, plus extra socks
- Toiletries
- A flashlight or headlamp with extra batteries
- A rain poncho
- A comfort item (For adults this could be a paperback book or an old smartphone loaded with music and Audible books.)
Split between the adults’ bags:
- Personal water filters and purification tablets
- The first aid kit and medications
- Copies of IDs, insurance cards, and important documents in a waterproof, zipper bag
- Cash in small bills, a pre-paid Visa card
- A charged power bank and charging cables
- A multi-tool or pocket knife
- Matches or a lighter
- A paper map of your area with your evacuation routes marked
- Supplies for your pets, if you have them (here’s how to pack a pet evacuation kit)
Other Cheap and Useful Items
Dollar stores are full of useful extras like glow sticks (especially around Halloween), flashlights, batteries, bungee cords, work gloves, sunglasses, and small tool sets. Check what you have at home first, then spend what you save on things you’re missing.
Build the Bags Your Family Needs
There are dozens of bug out bag lists online, and most of them include more gear than your family will ever carry or need. Base your choices on the emergencies you’re most likely to face and the people in your family, including elderly relatives or anyone with medical needs. Start with the basics and add a few items each month. Clearance racks after the holidays are a great place to fill in the gaps.
Frequently Asked Questions
You can build a basic three-day bag for about $20 to $35 per person by pulling clothing and supplies from home and shopping dollar stores. A good water filter is probably going to be the single expense, but you only need one per adult. Even then, it’s optional.
Every bag needs water, three days of food, clothing, toiletries, and a light. One adult carries shared and heavier items like the first aid kit, water filter, documents, and cash.
Pack one or two liters per person in a lightweight container. A full gallon per person per day, which is the usual recommended amount, is too heavy to carry for three days.
Keep a child’s pack at no more than about 10% of their body weight. Let them carry their own clothes and a comfort item, and put the heavier gear in the adults’ bags.
Check them every six months. Two dates easy to remember are the dates for the Spring and Fall Equinox. These are perfectly timed to refresh your bags for hot weather and the cold winter season. This is when you’ll rotate the food and water, check for things like leaks and issues with packaging, and swap clothing for the season, checking that the kids’ clothes still fit.
The Final Word
A bug out bag doesn’t need expensive gear to do its job, which is simply having the most essential supplies at your fingertips in any type of emergency. Pack for the emergencies you’re most likely to face, and cover water and food first. You can fill in the rest over time. Even for a big family, it’s doable on a budget, and it’s a lot less stressful to grab a packed bag than to throw one together while the sirens are going off.
If you only had $35, what would you buy for a bug-out bag?
Moleskin, pre-cut to size.
Gatoraid/ Gookinaid, available in pre-measured packets.
I find many of the things I put in my bags at Goodwill. Sleeping bag 8lbs of fill $8.00, closed cell foam sleeping pad (thick yoga mat) $3.50, mess kit (pan, dish, small pot and cup. that nest and close) $2.50, good large backpack $7.00. I even found a backpackers tent new (the tent poles and stakes were still wrapped in plastic) $3.00. box of 48 tea candles $1.50. and GI wool blankets as well $1.00 to $2.00. flash lights $.50 and some of them were surefire lights. always run any cloth product you buy thru a long high dryer cycle at a laundry mat before bring it in the house. and before you even wash it (this will kill any bedbugs washing dose not do it). do not run wool blankets thru the dryer wet. if the are dry the do not shrink
Thrift stores, garage sales, craigslist are your friends if you are trying to build a BOB on a budget.
Personally the one thing that I always carry no matter what is a roll of vet wrap and a couple packs of gauze in a ziplock. Vet wrap at a feed store costs 88 cents a roll. Gauze at a feed store is under 3 bucks for 200 gauze pads. Exact same stuff they sell in drug stores for 5 dollars for 25 pads, except the animal ones aren’t individually sealed. Hands down those two items are what I use the most in medical emergencies. Couple them with small containers of whatever disinfectants from home and you have a far superior first aid kit to any you can buy in a store.
Thanks for mentioning vet wrap. I’ve stocked up on that and have only mentioned it once or twice on the blog.
Great article!
I would add: Water bottle…stainless so can use to boil water for dehydrated meals, emergency blanket
Wow, it’s interesting that you went through the possible scenarios before completely packing. My cousin is looking to buy a 12-hour bug out bag so he can do some fun stuff with his friends this year. I think I will also talk to him about thinking about the possible scenarios so he can pack accordingly.
Contents here are well organized and very practical one. Got new ideas too.
Great guide on a budget! As far as the bug out bag goes, I’m trying to plan for the possibility that if the SHTF in the winter, I may have to survive off of it for a few months… I’m worried about equipment malfunctioning or getting lost over such a long period, so I think I tend to overpack. It’s a struggle!
Food, as much food as I can 🙂
Just kidding! I would say a stainless steel pot, matches, a knife(like those $1 knives with saw-teeth) and a wool blanket.
Fair enough? Probably not!
What I would be more concerned about is the psychical impact of an outage. Now, that’s a real issue to deal with.
I’ll leave you with one of my fav quotes: “Do the hard things when it’s easy!”
I’d go ahead and pack the men’s razor but maybe not use it. In emergencies people loot other people and looking “fine” or well groomed might set you apart. Even when not in a shtf situation you still need to blend in, knowing you’re all in this together. Also be able to make decisions as to how you share your resources rather than having them taken from you. It’s a mental and emotional health thing as well as survival.
“Also be able to make decisions as to how you share your resources rather than having them taken from you. It’s a mental and emotional health thing as well as survival.” If I’m a solo woman, pls advise on how I get to choose rather than having taken from me? Would appreciate some examples of your thinking and real life situation. Thanks.
Cat, I would begin now by assessing your current location, circle of acquaintances/friends, and whether or not you have a support system if things go terribly wrong in your area. That provides a layer of protection with multiple people aware of what’s going on around you. As far as sharing goes, again, not being totally alone and having built a circle of trusted friends and even trusted acquaintances, is key to having options. Some people, including single women, have stocked up on certain supplies specifically to share in a major catastrophe. Things like containers with a few canned foods, hygiene supplies, etc. However, any sharing should be done away from your home location, meeting in a public place OR giving care packages, extra food, etc. to reputable charitable/humanitarian organizations or churches.
As a single woman, your first priority is your own safety.
Helpful links:
https://thesurvivalmom.com/being-charitable-prepper/
https://thesurvivalmom.com/charity-prepping/
A workshop that will give you a lot more specifics re: building that support system is my “Find Your People Project”, LINK: https://members.survivalmomsisterhood.com/offers/9d72hzdR